您好,登录后才能下订单哦!
密码登录
登录注册
点击 登录注册 即表示同意《亿速云用户服务条款》
小编给大家分享一下搭建eclipse+maven+spring mvc项目的示例,希望大家阅读完这篇文章之后都有所收获,下面让我们一起去探讨吧!
操作系统
windows10
JDK
jdk1.8.0_192
IDE
Eclipse IDE for Enterprise Java Developers.
Version: 2019-06 (4.12.0) Build id: 20190614-1200
1.配置settings.xml
创建一个settings.xml文件,复制下列代码到文件中
<?xml version="1.0" encoding="UTF-8"?>
 <settings xmlns="http://maven.apache.org/SETTINGS/1.0.0"
      xmlns:xsi="http://www.w3.org/2001/XMLSchema-instance"
      xsi:schemaLocation="http://maven.apache.org/SETTINGS/1.0.0 http://maven.apache.org/xsd/settings-1.0.0.xsd">

 <!-- 本地maven库路径 -->
  <localRepository>D:\DxOffice\repository</localRepository>

 <!--  中央maven库 -->
  <mirrors>
   <mirror>
     <id>nexus-aliyun</id>
     <mirrorOf>*</mirrorOf>
     <name>Nexus aliyun</name>
     <url>http://maven.aliyun.com/nexus/content/groups/public</url>
   </mirror>
  </mirrors>

 </settings>
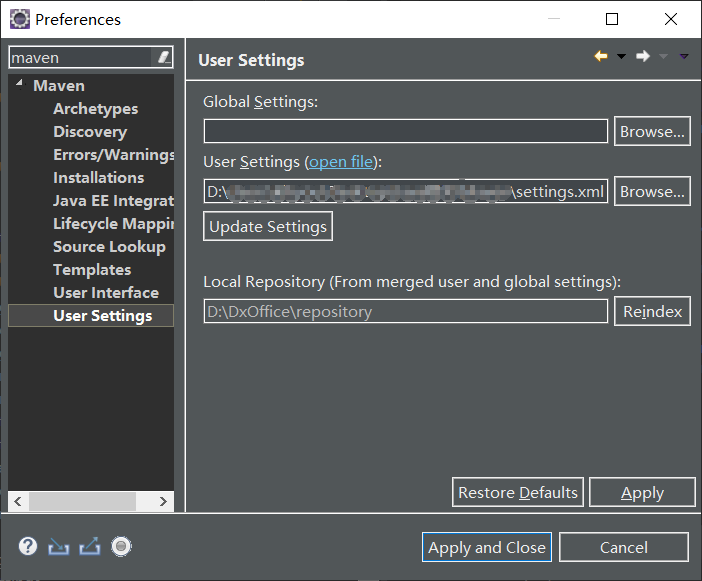
配置
Window -> Preferences
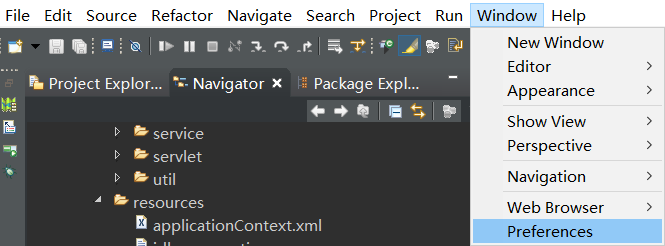
Maven -> User Settings -> User Settings ->Browse...->Apply and Close
2.创建Maven项目
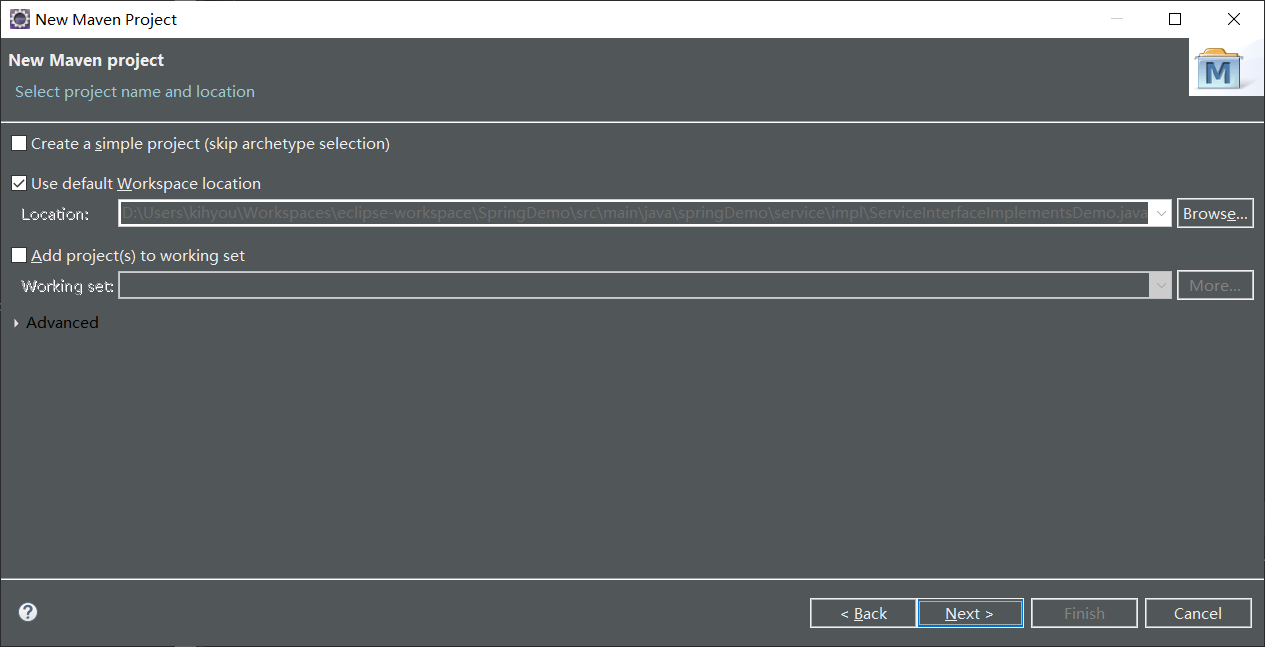
File -> New ->Maven Project(/Other...->Maven Project -> Next)


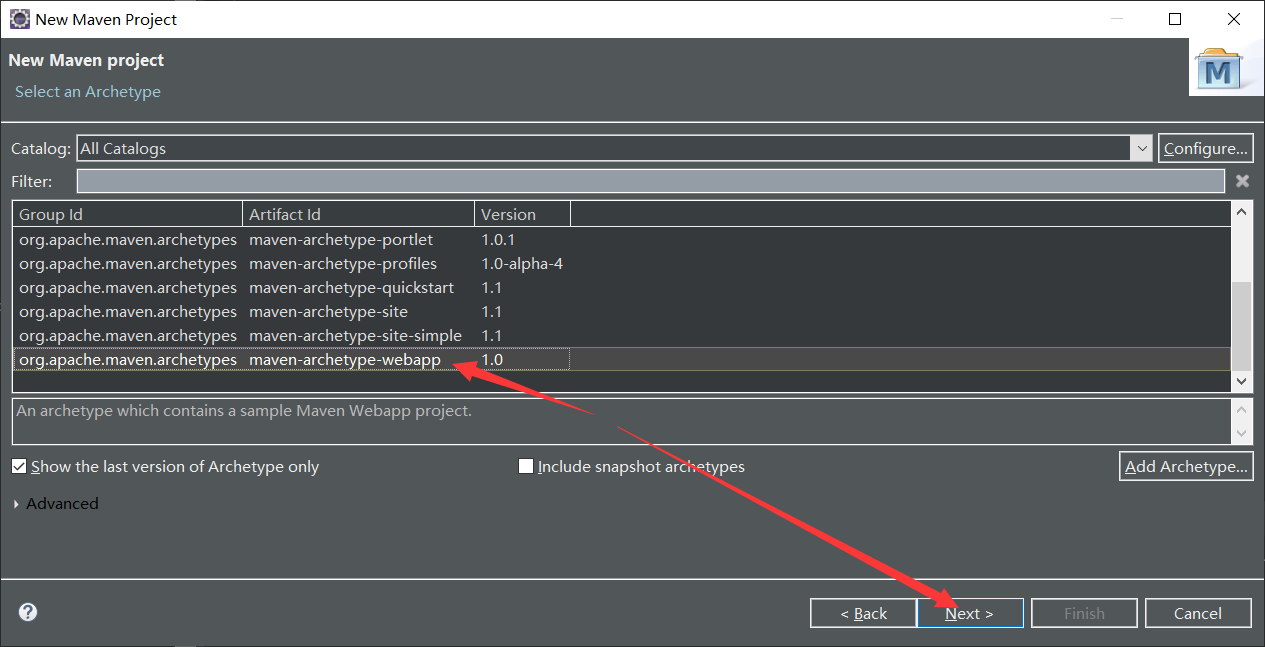
Next
org.apache.maven.archetypes maven-archetype-webapp 1 .0->Next
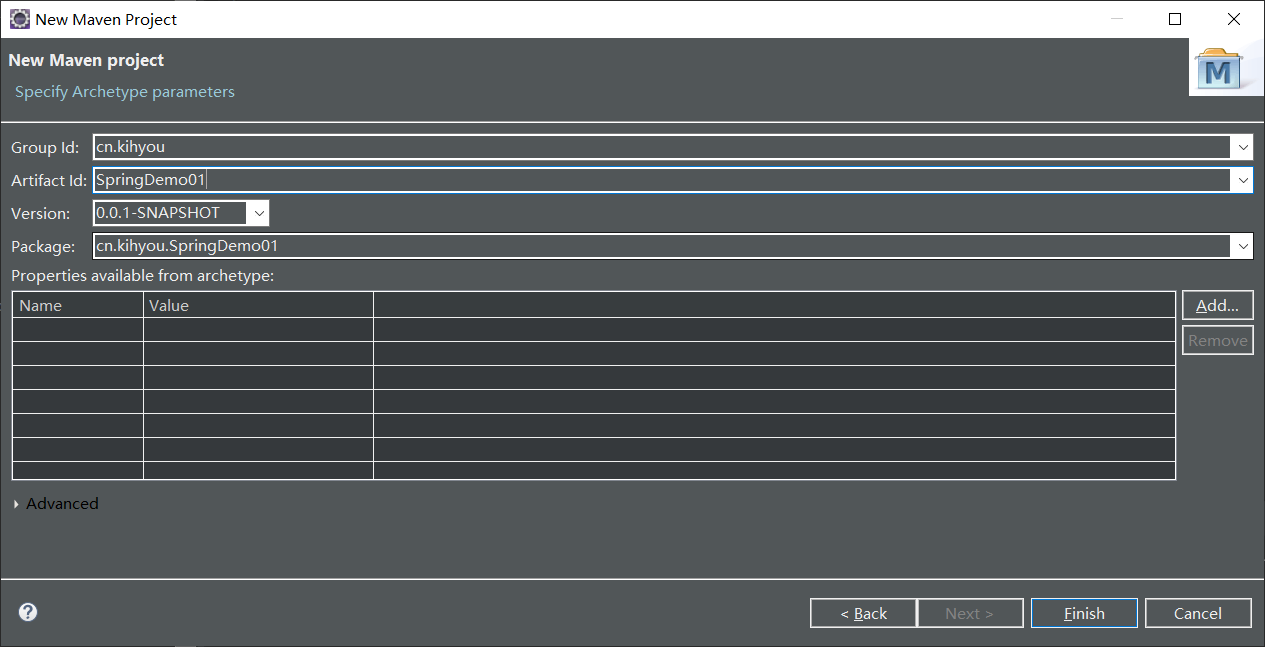
Group Id、Artifact Id、Version、Package -> Finish
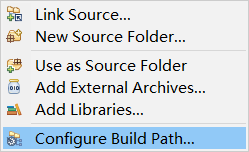
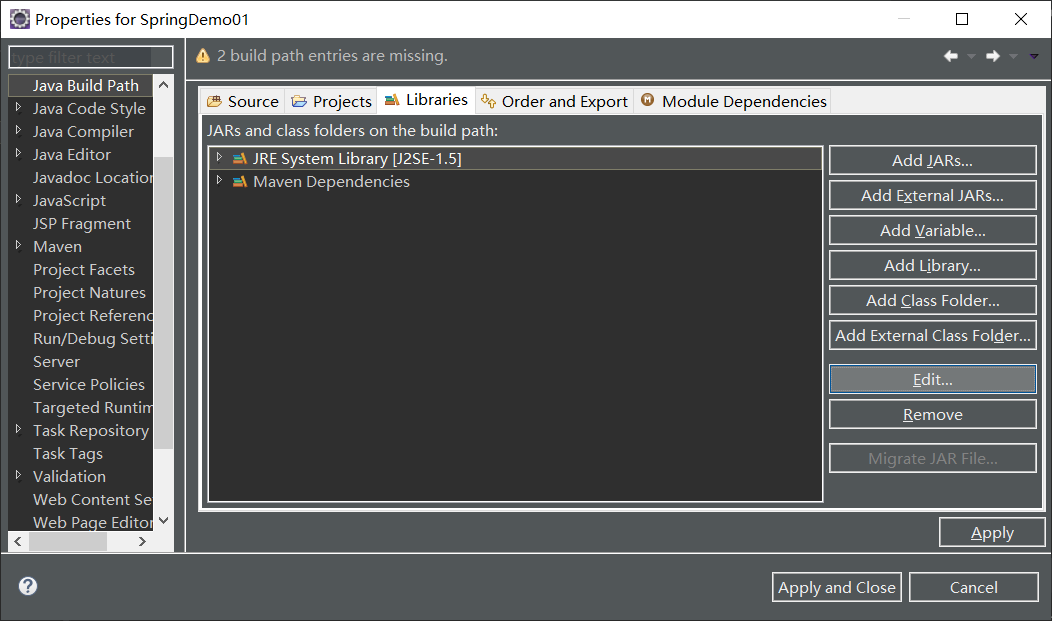
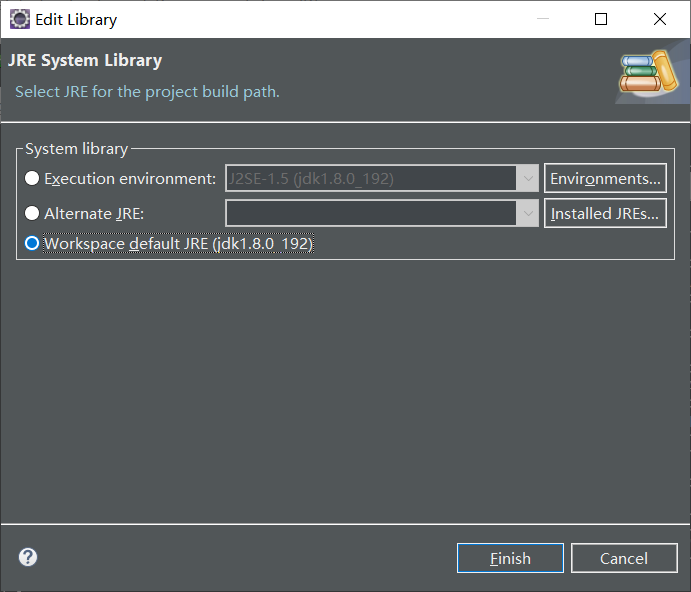
3.修改JRE
Build Path
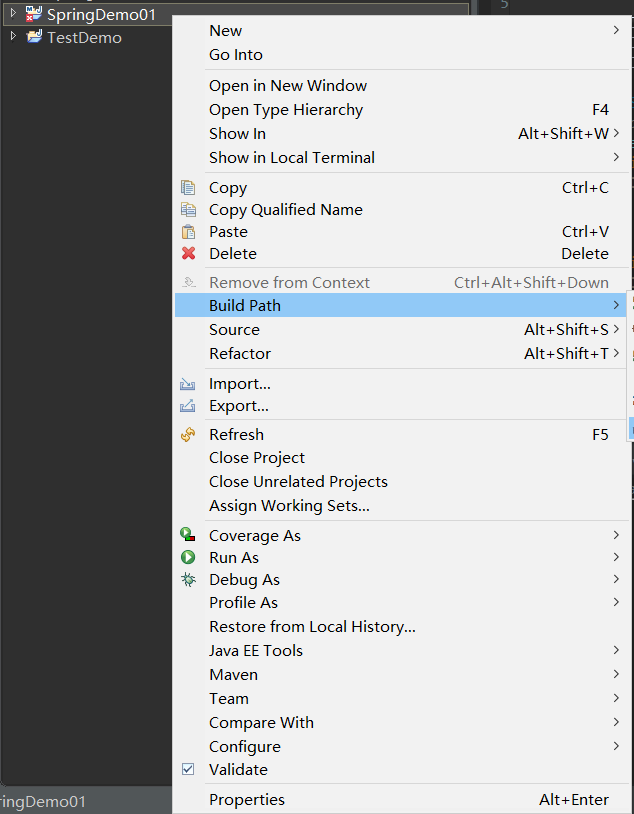
Configure Build Path...
Libraries -> JRE System Library -> Edit
Workspace default JRE ->Finish
4.配置pom.xml
修改<dependencies></dependcies>内代码如下
<dependencies>
     <dependency>
       <groupId>mysql</groupId>
       <artifactId>mysql-connector-java</artifactId>
       <version>8.0.17</version>
     </dependency>

     <!-- https://mvnrepository.com/artifact/javax.servlet.jsp/jsp-api -->
     <dependency>
       <groupId>javax.servlet.jsp</groupId>
       <artifactId>jsp-api</artifactId>
       <version>2.2</version>
       <scope>provided</scope>
     </dependency>

     <dependency>
       <groupId>commons-io</groupId>
       <artifactId>commons-io</artifactId>
       <version>2.6</version>
     </dependency>

     <!-- https://mvnrepository.com/artifact/commons-fileupload/commons-fileupload -->
     <dependency>
       <groupId>commons-fileupload</groupId>
       <artifactId>commons-fileupload</artifactId>
       <version>1.4</version>
     </dependency>

     <!-- https://mvnrepository.com/artifact/com.alibaba/fastjson -->
     <dependency>
       <groupId>com.alibaba</groupId>
       <artifactId>fastjson</artifactId>
       <version>1.2.59</version>
     </dependency>

     <dependency>
       <groupId>jstl</groupId>
       <artifactId>jstl</artifactId>
       <version>1.2</version>
     </dependency>

     <dependency>
       <groupId>junit</groupId>
       <artifactId>junit</artifactId>
       <version>4.11</version>
       <scope>test</scope>
     </dependency>

     <dependency>
       <groupId>javax.servlet</groupId>
       <artifactId>javax.servlet-api</artifactId>
       <version>3.1.0</version>
     </dependency>

     <dependency>
       <groupId>javax.servlet.jsp</groupId>
       <artifactId>javax.servlet.jsp-api</artifactId>
       <version>2.3.1</version>
     </dependency>

     <!-- https://mvnrepository.com/artifact/org.springframework/spring-webmvc -->
     <dependency>
       <groupId>org.springframework</groupId>
       <artifactId>spring-webmvc</artifactId>
       <version>4.3.11.RELEASE</version>
     </dependency>
     <!-- https://mvnrepository.com/artifact/org.springframework/spring-jdbc -->
     <dependency>
       <groupId>org.springframework</groupId>
       <artifactId>spring-jdbc</artifactId>
 <version>4.3.11.RELEASE</version>
</dependency>
</dependencies>
<build></build>内添加<plugins></plugins>,代码如下
<plugins>
<plugin>
<groupId>org.eclipse.jetty</groupId>
<artifactId>jetty-maven-plugin</artifactId>
<version>9.3.7.v20160115</version>
<configuration>
<httpConnector>
<port>8081</port>
</httpConnector>
<webApp>
<contextPath>/${project.artifactId}</contextPath>
</webApp>
<contextHandlers>
<!-- 附件目录服务 -->
<contextHandler implementation="org.eclipse.jetty.maven.plugin.JettyWebAppContext">
<contextPath>/image</contextPath>
<resourceBase>D:\DxOffice\workspace\image</resourceBase>
</contextHandler>
</contextHandlers>
<encoding>UTF-8</encoding>
<scanIntervalSeconds>10</scanIntervalSeconds>
</configuration>
</plugin>
<!-- 要解决静态文件锁定问题org\eclipse\jetty\jetty-webapp\ -->
<!-- org\eclipse\jetty\webapp\webdefault.xml -->
<!-- <init-param> -->
<!-- <param-name>useFileMappedBuffer</param-name> -->
<!-- <param-value>true</param-value> change to false -->
<!-- </init-param> -->
<plugin>
<groupId>org.apache.tomcat.maven</groupId>
<artifactId>tomcat7-maven-plugin</artifactId>
<version>2.2</version>
<configuration>
<path>/${project.artifactId}</path>
<port>8080</port>
<uriEncoding>UTF-8</uriEncoding>
<finalName>${project.artifactId}</finalName>
<server>tomcat7</server>
</configuration>
</plugin>
<plugin>
<groupId>org.apache.maven.plugins</groupId>
<artifactId>maven-compiler-plugin</artifactId>
<version>3.7.0</version>
<configuration>
<source>1.8</source>
<target>1.8</target>
<encoding>UTF-8</encoding>
</configuration>
</plugin>
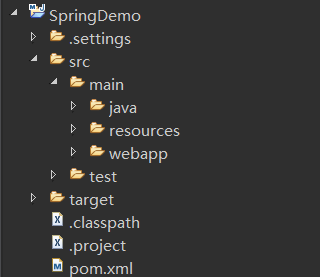
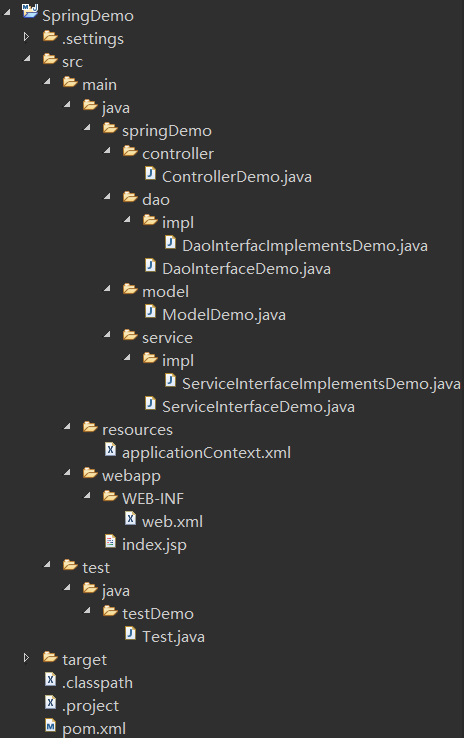
</plugins>5.主目录结构搭建
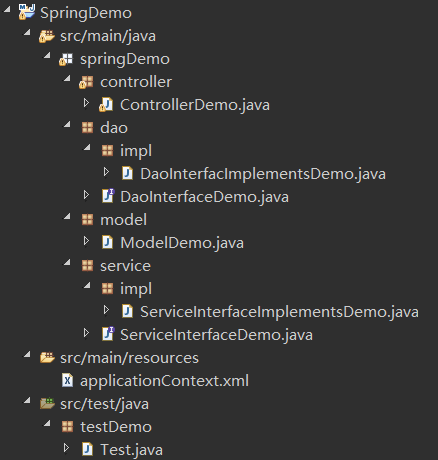
M
model
V
view
C
controller
service
看完了这篇文章,相信你对“搭建eclipse+maven+spring mvc项目的示例”有了一定的了解,如果想了解更多相关知识,欢迎关注亿速云行业资讯频道,感谢各位的阅读!
免责声明:本站发布的内容(图片、视频和文字)以原创、转载和分享为主,文章观点不代表本网站立场,如果涉及侵权请联系站长邮箱:is@yisu.com进行举报,并提供相关证据,一经查实,将立刻删除涉嫌侵权内容。