环境说明和主机规划:
操作系统 主机名 主机 角色 端口
CentOS 7.3 master 10.0.40.191 PG-Master 54321
CentOS 7.3 slave 10.0.40.192 PG-Slave 54321
CentOS 7.3 pool 10.0.40.193 pgpool 54321
基础环境配置(所有主机操作)
配置HOSTS
echo -e "10.0.40.191 master\n10.0.40.192 slave\n10.0.40.193 pool" >> /etc/hosts #
执行一次即可
[root@pgpool-tdb01 ~]# echo -e "10.0.40.191 master\n10.0.40.192
slave\n10.0.40.193 pool" >> /etc/hosts
[root@pgpool-tdb01 ~]# cat /etc/hosts
127.0.0.1 localhost localhost.localdomain localhost4 localhost4.localdomain4
::1 localhost localhost.localdomain localhost6 localhost6.localdomain6
10.0.40.191 master
10.0.40.192 slave
10.0.40.193 pool
配置统一的时间(若已配置,请忽略)
yum install -y ntpdate && ntpdate ntp1.aliyun.com
echo -e "# sync time from ntp1.aliyun.com\n5 * * * * /usr/sbin/ntpdate ntp1.aliyun.com >
/dev/null 2>&1
" >> /var/spool/cron/root # 写入定时任务,执行一次即可
[root@pgpool-tdb01 ~]# yum install -y ntpdate && ntpdate ntp1.aliyun.com
Loaded plugins: fastestmirror, langpacks
......
Dependency Updated:
openssl.x86_64 1:1.0.2k-16.el7 openssl-libs.x86_64 1:1.0.2k-
16.el7
Complete!
17 Feb 17:15:16 ntpdate[32460]: step time server 120.25.115.20 offset 1.439184 sec
[root@pgpool-tdb01 ~]# echo -e "# sync time from ntp1.aliyun.com\n5 * * * *
/usr/sbin/ntpdate ntp1.aliyun.com > /dev/null 2>&1" >> /var/spool/cron/root
[root@pgpool-tdb01 ~]# cd /var/spool/cron
[root@pgpool-tdb01 cron]# ll
total 4
-rw-r--r--. 1 root root 94 Feb 17 17:29 root
[root@pgpool-tdb01 cron]# cat root
# sync time from ntp1.aliyun.com
5 * * * * /usr/sbin/ntpdate ntp1.aliyun.com > /dev/null 2>&1
[root@pgpool-tdb01 cron]# crontab -l
# sync time from ntp1.aliyun.com
5 * * * * /usr/sbin/ntpdate ntp1.aliyun.com > /dev/null 2>&1
创建postgres用户:
useradd postgres && echo "your_password" | passwd --stdin postgres
useradd postgres && echo "XXXX" | passwd --stdin postgres
[root@pgpool-tdb02 ~]# useradd postgres && echo "XXXX" | passwd --stdin
postgres
Changing password for user postgres.
passwd: all authentication tokens updated successfully.
配置免密钥登陆:
su - postgres
ssh-keygen -t rsa -f /home/postgres/.ssh/id_rsa -P ""
cd ~/.ssh/
ssh-copy-id postgres@master # 三台主机执行
scp authorized_keys postgres@slave:~/.ssh # 只在master主机执行
scp authorized_keys postgres@pool:~/.ssh # 只在master主机执行
[root@pgpool-tdb01 ~]# su - postgres
[postgres@pgpool-tdb01 ~]$ ssh-keygen -t rsa -f /home/postgres/.ssh/id_rsa -P ""
Generating public/private rsa key pair.
Created directory '/home/postgres/.ssh'.
Your identification has been saved in /home/postgres/.ssh/id_rsa.
Your public key has been saved in /home/postgres/.ssh/id_rsa.pub.
The key fingerprint is:
d7:39:7d:00:55:47:0f:4f:bf:ae:85:31:9c:f6:e8:9f postgres@pgpool-tdb01
The key's randomart image is:
+--[ RSA 2048]----+
| ..oo=|
| . ++|
| . +|
| ..o...|
| S . +*...|
| . ..B. |
| o + |
| . o .|
| o.E |
+-----------------+
[postgres@pgpool-tdb01 ~]$ cd ~/.ssh/
[postgres@pgpool-tdb01 .ssh]$ ssh-copy-id postgres@master
The authenticity of host 'master (10.0.40.191)' can't be established.
ECDSA key fingerprint is 1a:f7:cc:f3:f8:4e:af:40:cf:fe:26:f6:12:7e:5f:46.
Are you sure you want to continue connecting (yes/no)? y
Please type 'yes' or 'no': yes
/bin/ssh-copy-id: INFO: attempting to log in with the new key(s), to filter out any
that are already installed
/bin/ssh-copy-id: INFO: 1 key(s) remain to be installed -- if you are prompted now
it is to install the new keys
postgres@master's password:
Number of key(s) added: 1
Now try logging into the machine, with: "ssh 'postgres@master'"
and check to make sure that only the key(s) you wanted were added.
[postgres@pgpool-tdb01 .ssh]$ scp authorized_keys postgres@slave:~/.ssh
The authenticity of host 'slave (10.0.40.192)' can't be established.
ECDSA key fingerprint is 37:ec:17:87:c6:8e:ee:6a:ba:47:a5:22:38:65:6b:21.
Are you sure you want to continue connecting (yes/no)? yes
Warning: Permanently added 'slave,10.0.40.192' (ECDSA) to the list of known hosts.
postgres@slave's password:
authorized_keys 100%
1207 1.2KB/s 00:00
[postgres@pgpool-tdb01 .ssh]$ scp authorized_keys postgres@pool:~/.ssh
The authenticity of host 'pool (10.0.40.193)' can't be established.
ECDSA key fingerprint is 95:2e:fd:0c:2f:4e:54:4d:1f:5e:eb:b3:95:61:aa:5d.
Are you sure you want to continue connecting (yes/no)? yes
Warning: Permanently added 'pool,10.0.40.193' (ECDSA) to the list of known hosts.
postgres@pool's password:
authorized_keys
安装Postgresql数据库(PG10.7)
yum安装:
[root@pgpool-tdb01 ~]# yum install
https://download.postgresql.org/pub/repos/yum/10/redhat/rhel-7-
x86_64/pgdg-centos10-10-2.noarch.rpm -y
[root@pgpool-tdb01 ~]# yum install postgresql10-contrib postgresql10-server
postgresql10 postgresql10-libs -y
创建统一的目录结构:
[root@pgpool-tdb01 ~]# mkdir /data1/pg_{data,bin,logs} -p
[root@pgpool-tdb01 ~]# ll /data1/
total 0
drwxr-xr-x. 2 root root 6 Feb 17 19:00 pg_bin
drwxr-xr-x. 2 root root 6 Feb 17 19:00 pg_data
drwxr-xr-x. 2 root root 6 Feb 17 19:00 pg_logs
[root@pgpool-tdb01 ~]# chown -R postgres.postgres /data1/
修改系统变量:
vi /etc/profile #增加以下内容
export PGHOME=/usr/pgsql-10/
export PGDATA=/data1/pg_data
export PGPORT=54321
export PATH=$PATH:$PGHOME/bin
# 生效
source /etc/profile
PostgreSQL流复制结构(master和slave主机操
作)
master主机操作
初始化系统
[root@pgpool-tdb01 ~]# /usr/pgsql-10/bin/postgresql-10-setup initdb
Initializing database ... OK
删除pg_data后重新初始化:
[postgres@wmsexpress-db01 ~]$ pg_ctl -D /data1/pg_data/ initdb
修改postgresql-10.service
vi /usr/lib/systemd/system/postgresql-10.service
# Include the default config:
#.include /usr/lib/systemd/system/postgresql-10.service
[Service]
Environment=PGDATA=/data1/pg_data
重启PG服务:
systemctl daemon-reload
su - postgres -c '/usr/pgsql-10/bin/initdb -D /data1/pg_data'
systemctl restart postgresql-10
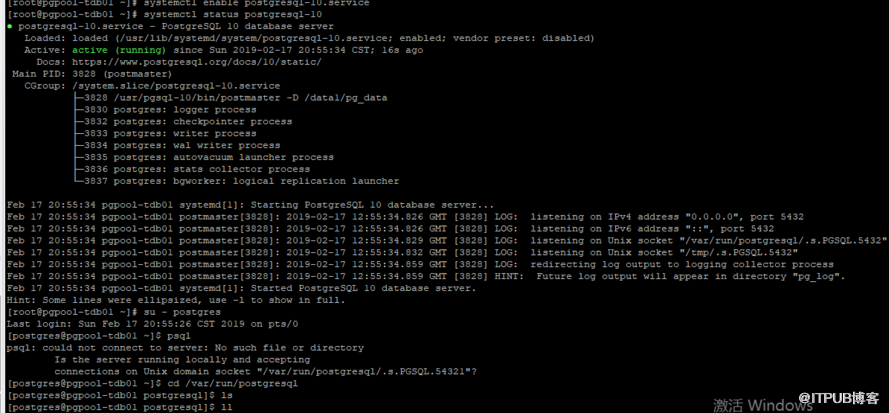
systemctl enable postgresql-10.service
systemctl status postgresql-10
/usr/pgsql-10/bin/pg_ctl -D /data1/pg_data -l logfile start
每次改postgresql.conf,需要执行下面的stop命令,再重启pg服务。
/usr/pgsql-10/bin/pg_ctl -D /data1/pg_data -l logfile stop
修改系统配置(以下用postgres用户操作):
也可以用root账号操作,注意目录权限。
[root@pgpool-tdb01 pg_data]# cp /data1/pg_data/pg_hba.conf{,.bak}
[root@pgpool-tdb01 pg_data]# cat >/data1/pg_data/pg_hba.conf<<EOF
> local all all trust
> host all all 10.0.40.191/32 trust
> host all all 10.0.40.192/32 trust
> host all all 0.0.0.0/0 md5
> host all all ::1/128 trust
> host replication stream_replication 0.0.0.0/0 md5
> EOF
cp /data1/pg_data/postgresql.conf{,.bak}
cat >/data1/pg_data/postgresql.conf<<EOF
listen_addresses = '*'
port = 54321
max_connections = 3000
shared_buffers = 1GB
effective_cache_size = 2GB
work_mem = 64MB
maintenance_work_mem = 128MB
min_wal_size = 128MB
max_wal_size = 256MB
checkpoint_completion_target = 0.9
wal_buffers = 16MB
default_statistics_target = 100
wal_level = hot_standby
wal_log_hints = on
max_wal_senders = 10
hot_standby = on
logging_collector = on
log_directory = 'pg_log'
log_timezone = 'PRC'
timezone = 'PRC'
EOF
#操作完记得重启 pg_ctl restart
[root@pgpool-tdb01 ~]# cat >/data1/pg_data/postgresql.conf<<EOF
> listen_addresses = '*'
> port = 54321
> max_connections = 200
> shared_buffers = 512MB
> effective_cache_size = 2GB
> work_mem = 64MB
> maintenance_work_mem = 256MB
> min_wal_size = 256MB
> max_wal_size = 512MB
> checkpoint_completion_target = 0.9
> wal_buffers = 16MB
> default_statistics_target = 100
> wal_level = hot_standby
> wal_log_hints = on
> max_wal_senders = 1
> hot_standby = on
> logging_collector = on
> log_directory = 'pg_log'
> EOF
[root@pgpool-tdb01 ~]# su - postgres
Last login: Sun Feb 17 20:02:31 CST 2019 on pts/0
[postgres@pgpool-tdb01 ~]$ pg_ctl restart
waiting for server to shut down.... done
server stopped
waiting for server to start....2019-02-17 12:25:10.486 GMT [3174] LOG: listening on
IPv4 address "0.0.0.0", port 54321
2019-02-17 12:25:10.486 GMT [3174] LOG: listening on IPv6 address "::", port
54321
2019-02-17 12:25:10.489 GMT [3174] LOG: listening on Unix socket
"/var/run/postgresql/.s.PGSQL.54321"
2019-02-17 12:25:10.492 GMT [3174] LOG: listening on Unix socket
"/tmp/.s.PGSQL.54321"
2019-02-17 12:25:10.520 GMT [3174] LOG: redirecting log output to logging
collector process
2019-02-17 12:25:10.520 GMT [3174] HINT: Future log output will appear in
directory "pg_log".
done
server started
在主库中创建流复制用户(stream_replication)和
PGPool用户(srcheck):
[postgres@pgpool-tdb01 ~]$ psql
psql (10.7)
Type "help" for help.
postgres=# psql
postgres-# \q
[postgres@pgpool-tdb01 ~]$ psql
psql (10.7)
Type "help" for help.
postgres=# CREATE USER stream_replication replication LOGIN CONNECTION
LIMIT 5 ENCRYPTED PASSWORD 'XXXX';
CREATE ROLE
postgres=# CREATE USER srcheck replication LOGIN CONNECTION LIMIT 5
ENCRYPTED PASSWORD 'XXXX';
CREATE ROLE
修改主库pg_hba.conf文件(已操作见cat
>/data1/pg_data/pg_hba.conf<<EOF):
host replication stream_replication 0.0.0.0/0 md5
slave主机操作
初始化系统
[root@pgpool-tdb02 ~]# /usr/pgsql-10/bin/postgresql-10-setup initdb
Initializing database ... OK
修改postgresql-10.service
[root@pgpool-tdb02 ~]# vi /usr/lib/systemd/system/postgresql-10.service
内容如下:
# Include the default config:
#.include /usr/lib/systemd/system/postgresql-10.service
[Service]
Environment=PGDATA=/data1/pg_data
重启PG服务
systemctl daemon-reload
基础备份复制到备库服务器
rm -rf /data1/pg_data # 如果没有重要数据可操作,主要为同步主库路径
[root@pgpool-tdb02 ~]# su - postgres -c 'pg_basebackup -D $PGDATA --
format=p -h master -p 54321 -U stream_replication -W'
关闭所有主机防火墙:(也可以在防火墙上设置端口限制)
如果你的系统上没有安装,使用命令安装
安装firewalld 防火墙yum install firewalld
开启服务
关闭防火墙systemctl stop firewalld.service
开机自动启动systemctl enable firewalld.service
关闭开机制动启动systemctl disable firewalld.service
赋权:
[root@pgpool-tdb01 pg_data]# chown postgres.postgres pg_hba.conf.bak
[root@pgpool-tdb01 pg_data]# chown postgres.postgres postgresql.conf.bak
error:
pg_basebackup: could not connect to server: could not connect to server: No route
to host
Is the server running on host "master" (10.0.40.191) and accepting
TCP/IP connections on port 54321?
pg_basebackup: could not connect to server: FATAL: number of requested standby
connections exceeds max_wal_senders (currently 1)
pg_basebackup: could not get write-ahead log end position from server: ERROR:
could not open file "./pg_hba.conf.bak": Permission denied
以上报错
需要关闭防火墙或在防火墙上设置端口限制。
[root@pgpool-tdb02 ~]# su - postgres -c 'pg_basebackup -D $PGDATA --
format=p -h master -p 54321 -U stream_replication -W'
Password:
[root@pgpool-tdb02 ~]# ll /data1/
total 4
drwxr-xr-x. 2 postgres postgres 6 Feb 17 19:03 pg_bin
drwx------. 21 postgres postgres 4096 Feb 17 21:18 pg_data
drwxr-xr-x. 2 postgres postgres 6 Feb 17 19:03 pg_logs
修改备库配置信息:
cp $PGHOME/share/recovery.conf.sample $PGDATA/recovery.conf
vi $PGDATA/recovery.conf
[postgres@pgpool-tdb02 ~]$ vi $PGDATA/recovery.conf
增加以下内容
standby_mode='on'
primary_conninfo = 'host=master port=54321 user=stream_replication
password=1qaz.com'
restore_command = ''
recovery_target_timeline = 'latest'
重启PG服务:
systemctl restart postgresql-10
systemctl enable postgresql-10.service
验证
主节点执行
create table test (id int4, create_time timestamp(0) without time zone);
insert into test values (3, now());
select * from test;
备节点执行
select * from test;
其他查询
进入测试数据库test,主库上执行如下命令返回f,备库上返回t。
select pg_is_in_recovery();
执行如下命令查看快照,它返回主库记录点、备库记录点;主库每增加一条写入,记录点的
值就会加1。
select txid_current_snapshot();
执行如下命令可以查看主备同步状态。
select * from pg_stat_replication;
字段state显示的同步状态有:startup(连接中)、catchup(同步中)、streaming(同
步);字段sync_state显示的模式有:async(异步)、sync(同步)、potential(虽然现
在是异步模式,但是有可能升级到同步模式)。
主:
postgres=# select pg_is_in_recovery();
pg_is_in_recovery
-------------------
f
(1 row)
备:
postgres=# select pg_is_in_recovery();
pg_is_in_recovery
-------------------
t
(1 row)
主备切换
假设主库崩溃了,备库如何从只读状态切换为读写状态呢?只要把备库的
postgresql.conf中hot_standby修改为off,并且删除recovery.conf,然后重启
库就可以提供服务了。
PGPool2(pool主机操作)
安装PGPool2
yum install -y http://www.pgpool.net/yum/rpms/3.6/redhat/rhel-7-
x86_64/pgpool-II-release-3.6-1.noarch.rpm
yum -y install pgpool-II-pg96 pgpool-II-pg96-debuginfo pgpool-II-pg96-devel
pgpool-II-pg96-extensions
systemctl enable pgpool.service #开启自动启动
下面的可以都安装:
yum install -y http://www.pgpool.net/yum/rpms/3.6/redhat/rhel-7-x86_64/pgpool-
II-pg10-3.6.14-1pgdg.rhel7.x86_64.rpm
yum install -y http://www.pgpool.net/yum/rpms/3.6/redhat/rhel-7-x86_64/pgpool-
II-pg10-debuginfo-3.6.14-1pgdg.rhel7.x86_64.rpm
yum install -y http://www.pgpool.net/yum/rpms/3.6/redhat/rhel-7-x86_64/pgpool-
II-pg10-devel-3.6.14-1pgdg.rhel7.x86_64.rpm
yum install -y http://www.pgpool.net/yum/rpms/3.6/redhat/rhel-7-x86_64/pgpool-
II-pg10-extensions-3.6.14-1pgdg.rhel7.x86_64.rpm
yum install -y http://www.pgpool.net/yum/rpms/3.6/redhat/rhel-7-x86_64/pgpool-
II-release-3.6-1.noarch.rpm
yum -y install pgpool-II-pg10 pgpool-II-pg10-debuginfo pgpool-II-pg10-devel
pgpool-II-pg10-extensions
systemctl enable pgpool.service #开启自动启动
添加Pgpool-II运行用户
useradd postgres # 环境准备时已操作
chown -R postgres.postgres /etc/pgpool-II
chown -R postgres.postgres /var/run/pgpool/
配置pool_hba.conf
cp /etc/pgpool-II/pool_hba.conf{,.bak}
vi /etc/pgpool-II/pool_hba.conf
增加内容
host all all 0.0.0.0/0 md5
配置pcp.conf
主节点登陆后执行:
postgres=# select rolname,rolpassword from pg_authid;
rolname | rolpassword
--------------------+-------------------------------------
pg_signal_backend |
srcheck | md5662c10f61b27a9ab38ce69157186b25f
postgres | md5d3612d57ee8d4c147cf27b11e3a0974d
stream_replication | md59279ef6b904bc483e4f85e6d44cfc0ed
(4 rows)
[root@pgpool-tdb01 ~]# su - postgres
Last login: Mon Feb 18 00:05:49 CST 2019 on pts/0
[postgres@pgpool-tdb01 ~]$ psql
psql (10.7)
Type "help" for help.
主节点上执行:
要postgres用户有MD5值,给postgres用户加密码。
alter user postgres with password '123';
postgres=# create user devuser with password 'XXXX';
CREATE ROLE
postgres=# create database wmsexpressdb;
CREATE DATABASE
postgres=# GRANT ALL PRIVILEGES ON DATABASE wmsexpressdb to devuser;
GRANT
postgres=# select rolname,rolpassword from pg_authid;
rolname | rolpassword
----------------------+-------------------------------------
pg_monitor |
pg_read_all_settings |
pg_read_all_stats |
pg_stat_scan_tables |
pg_signal_backend |
stream_replication | md5b90626724a074c98507b58e9937298cb
srcheck | md544f2f6847b7c760bfb8331b345d2591f
postgres | md5289451de0ccee765f70bb6146e4d6c20
devuser | md5e75b559c51552b755247ecae024a6f24
(9 rows)
加入MD5认证:
[root@wmsexpress-pgpool01 pgpool-II]# vi pool_passwd
stream_replication:md5b90626724a074c98507b58e9937298cb
srcheck:md544f2f6847b7c760bfb8331b345d2591f
postgres:md5289451de0ccee765f70bb6146e4d6c20
devuser:md5e75b559c51552b755247ecae024a6f24
重启pgpool 让设置生效:
[root@wmsexpress-pgpool01 pgpool-II]# psql -p 54321 -h 10.0.4.37 -U devuser -d
postgres
psql: FATAL: md5 authentication failed
DETAIL: pool_passwd file does not contain an entry for "devuser"
[root@wmsexpress-pgpool01 pgpool-II]# pgpool stop
2019-03-04 11:56:08: pid 16620: LOG: stop request sent to pgpool. waiting for
termination...
.done.
[root@wmsexpress-pgpool01 pgpool-II]# pgpool -C -D
[root@wmsexpress-pgpool01 pgpool-II]# psql -p 54321 -h 10.0.4.37 -U devuser -d
postgres
Password for user devuser:
psql (10.7)
Type "help" for help.
postgres=>
postgres=# select rolname,rolpassword from pg_authid;
rolname | rolpassword
----------------------+-------------------------------------
pg_monitor |
pg_read_all_settings |
pg_read_all_stats |
pg_stat_scan_tables |
pg_signal_backend |
stream_replication | md5cbdf308c01aeea690cefb040a85dd4ee
srcheck | md5ed70f2fcca0c9060ac658734adbae8bb
postgres | md510220e27448e3d1bf2531c9d99ad7b9e
(8 rows)
[root@pgpool-t01 pgpool-II]# vi /etc/pgpool-II/pool_passwd
增加SQL执行结果的内容,形式为$rolname:$rolpassword例如:
srcheck:md5662c10f61b27a9ab38ce69157186b25f #建议用这个方式
1
或者:
pg_md5 -u postgres your_password
vi /etc/pgpool-II/pcp.conf ## 加入 postgres:上一命令的输出
增加devuser,并设置superuser权限,加入MD5认证。
配置pgpool.conf
cp /etc/pgpool-II/pgpool.conf{,.bak}
vi /etc/pgpool-II/pgpool.conf
# CONNECTIONS
listen_addresses = '*'
port = 54321
socket_dir = '/var/run/pgpool'
pcp_listen_addresses = '*'
pcp_port = 9898
pcp_socket_dir = '/var/run/pgpool'
# - Backend Connection Settings -
backend_hostname0 = 'master'
backend_port0 = 54321
backend_weight0 = 1
backend_data_directory0 = '/data1/pg_data'
backend_flag0 = 'ALLOW_TO_FAILOVER'
backend_hostname1 = 'slave'
backend_port1 = 54321
backend_weight1 = 1
backend_data_directory1 = '/data1/pg_data'
backend_flag1 = 'ALLOW_TO_FAILOVER'
# - Authentication -
enable_pool_hba = on
pool_passwd = 'pool_passwd'
# FILE LOCATIONS
pid_file_name = '/var/run/pgpool/pgpool.pid'
logdir = '/data1/pg_logs'
replication_mode = off
load_balance_mode = on
master_slave_mode = on
master_slave_sub_mode = 'stream'
sr_check_period = 5
sr_check_user = 'srcheck'
sr_check_password = 'XXXX'
sr_check_database = 'postgres'
# HEALTH CHECK 健康检查
health_check_period = 10
health_check_timeout = 20
health_check_user = 'srcheck'
health_check_password = 'XXXX'
health_check_database = 'postgres'
# FAILOVER AND FAILBACK
failover_command = '/data1/pg_bin/failover_stream.sh %H'
failover_stream.sh脚本
vim /data1/pg_bin/failover_stream.sh
[root@pgpool-t01 pg_bin]# chown postgres.postgres failover_stream.sh
chmod 777 /data1/pg_bin/failover_stream.sh
chmod u+s /sbin/ifconfig
chmod u+s /usr/sbin
pgpool -n -d -D > /data1/pg_logs/pgpool.log 2>&1 & ## 启动
pgpool -m fast stop ## 关闭
[root@pgpool-t01 ~]# pgpool -n -d -D > /data1/pg_logs/pgpool.log 2>&1 &
[1] 3404
[root@pgpool-t01 ~]# pgpool -m fast stop
2019-02-18 00:49:29: pid 3439: LOG: stop request sent to pgpool. waiting for
termination...
.done.
[1]+ Done pgpool -n -d -D > /data1/pg_logs/pgpool.log 2>&1
failover_stream.sh内容:
#! /bin/sh
# Failover command for streaming replication.
# Arguments: $1: new master hostname.
new_master=$1
trigger_command="$PGHOME/bin/pg_ctl promote -D $PGDATA"
# Prompte standby database.
/usr/bin/ssh -T $new_master $trigger_command
exit 0;
登陆设置
当执行 pgpool -n -d -D > /data1/pg_logs/pgpool.log 2>&1 & 后可查看集群状态:
[root@pgpool-t01 ~]# psql -p 54321 -h 10.0.40.193 -U srcheck -d
postgres
Password for user srcheck:
psql (10.7)
Type "help" for help.
postgres=> show pool_nodes;
node_id | hostname | port | status | lb_weight | role | select_cnt |
load_balance_node | replication_delay
---------+----------+-------+--------+-----------+---------+------------+---
----------------+-------------------
0 | master | 54321 | up | 0.500000 | primary | 0 | true
| 0
1 | slave | 54321 | up | 0.500000 | standby | 0 | false
| 0
(2 rows)
如果未发现集群状态,请在master和slave主机分别执行以下操作:
[postgres@pool ~]$ pcp_attach_node -d -U postgres -h pool -p 9898 -n 0
[postgres@pool ~]$ pcp_attach_node -d -U postgres -h pool -p 9898 -n 1
#详情查询命令pcp_attach_node
查看pgpool的服务状态:
[root@pgpool-t01 pgpool-II]# systemctl status pgpool.service
[root@pgpool-t01 pgpool-II]# systemctl status pgpool
[root@pgpool-t01 pgpool-II]# systemctl start pgpool.service
[root@pgpool-t01 pgpool-II]# systemctl start pgpool
[root@pgpool-t01 pgpool-II]# systemctl stop pgpool.service
测试SQL:
insert into test values (20,now());
select * from test;
psql -p 54321 -h 10.0.40.193 -U srcheck -d postgres
systemctl daemon-reload
su - postgres -c '/usr/pgsql-10/bin/initdb -D /data1/pg_data'
systemctl restart postgresql-10
systemctl enable postgresql-10.service
systemctl status postgresql-10
所有应用连接到PGPOOL节点,写入会话会自动分配到PG主节点,只读会话会以会话级平
均分配到PG主从两个节点上。