您好,登录后才能下订单哦!
密码登录
登录注册
点击 登录注册 即表示同意《亿速云用户服务条款》
1:web网站的设计哲学(MVC/MTV的设计哲学)
2:Request && response
1: Request——用户有5种方式对服务器发起请求
POST请求(正常情况下都会带参数) 常用语表单场景
#get不带参数 get通过?加参数   post请求的url格式如下
path('hello/', views.index, name='index'),
#关键字传参数  (?<参数名>参数类型)——视图中直接通过参数名获取值(最常用)
re_path('hello/(?P<year>[0-9]{4})/(?P<month>[0-9]{2})/', views.index, name='index')
]
2:Response——2大类3小类获取到数据
request.method —— 判断请求的方式
request.body —— 第一种获取数据数据的方式
print(type(request.body)) # byte
print(QueryDict(request.body)) # QueryDict
print(QueryDict(request.body).dict) # dict
request.GET # 第二种方式获取GET QueryDictrequest.GET.get('name','devops')
request.POST # 第二种获取post数据方式 <QueryDict: {'year': ['2019']request.POST.getlist('id')
1. 安装mysql驱动
pip3 install mysqlclient
如果报错,请参考:https://blog.51cto.com/qiangsh/2422115
2. 修改数据库配置
$ cat devops/settings.py

# 注释原有数据库配置
# Database
# https://docs.djangoproject.com/en/2.2/ref/settings/#databases
#
# DATABASES = {
#     'default': {
#         'ENGINE': 'django.db.backends.sqlite3',
#         'NAME': os.path.join(BASE_DIR, 'db.sqlite3'),
#     }
# }

# 使用mysql数据库替换掉上面sqlite3
DATABASES = {
    'default': {
        'ENGINE': 'django.db.backends.mysql',
        'NAME': 'devops',
        'USER': 'devops',
        'PASSWORD': '123456',
        'HOST': '127.0.0.1',
        'PORT': '3306',
    }
}
3. 初始化数据库(需要在setting中注册APP)
# 查看现有的迁移文件的状态,是否同步到数据库中
python manage.py showmigrations

# 同步models到本地数据库文件
python manage.py makemigrations

# 同步数据库文件里的sql预计到数据库执行
python manage.py migrate

# 创建admin超级管理员(登录Django Admin页面使用)
python manage.py createsuperuser

# 启动
python manage.py runserver 0.0.0.0:80001: HTML、CSS
$ view.py
return render(request, 'index.html', {"user":user})
$ index.html
<table>
<thead>
<tr>
<th>姓名</th><th>年龄</th>
</tr>
<thead>
<tbody>
{% for user in users %}
<tr>
<td>{{user.name}}</td><td>{{user.age}}</td>
</tr>
{% endfor %}
</tbody>
</table>$ login.html
<form method="POST",action="{% url 'hello:login' %}">
<input name='username' type="text" >
<input name='passwd' type="password" >
<button type="submit">登录</button>
</form>2: bootstrap
3: 实战——打通TV,模板继承,渲染一个表格数据
$ cat  hello/urls.py
app_name = 'hello'
urlpatterns = [
    path('list/', views.list, name = 'list'),
]
第二步:编写对于url的view,提供伪数据来处理用户请求
$ cat  hello/views.py
def list(request,*args,**kwargs):
    users = [
        {'username': 'qsh2', 'name_cn': 'qsh2', 'age': 18},
        {'username': 'qsh3', 'name_cn': 'qsh3', 'age': 19},
        {'username': 'qsh4', 'name_cn': 'qsh4', 'age': 20},
        ]
    return render(request,'list.html',{'users':users})
第三步:模板继承及渲染
$ cat templates/base.html   # 模板

……
 {% load static %}

 <title>{% block title %} 自动化运维平台 {% endblock %} </title>

  <a href="{#% url 'users:user_detail' request.user.id %#}" class="btn btn-default btn-flat">个人主页</a>

 <!-- 第二层右边内容部分 -->
<div class="content-wrapper">

    <!-- 面包屑导航部分 -->
    <section class="content-header">
    {% block breadcrunb %}
    {%  endblock %}
    </section>

    <!-- 主要内容 -->
    <section class="content">
    {% block content %}
    {% endblock %}
    </section>

</div>
<!-- 第二层右边结束 -->

……
$ cat templates/list.html # 子页面继承
<!-- 引用:子页面继承母模板 -->
{% extends "base.html" %}
<!-- 定义标题 -->
{% block title %} 用户权限管理系统 {% endblock %}
<!-- 块级:面包屑导航部分 -->
{% block breadcrunb %}
<h3>用户展示</h3>
<!-- 块级结束标志 -->
{% endblock %}
{% block content %}
<table class="table table-striped table-hover table-bordered">
<thead>
<tr>
<th>序号</th>
<th>用户名</th>
<th>姓名</th>
<th>年龄</th>
</tr>
</thead>
<tbody>
<!--循环获取 views.py 返回的{'users':users}数据-->
{% for user in users %}
<tr>
<td>{{ forloop.counter }}</td>
<td>{{ user.username }}</td>
<td>{{ user.name_cn }}</td>
<td>{{ user.age }}</td>
</tr>
{% endfor %}
</tbody>
</table>
{% endblock %}效果图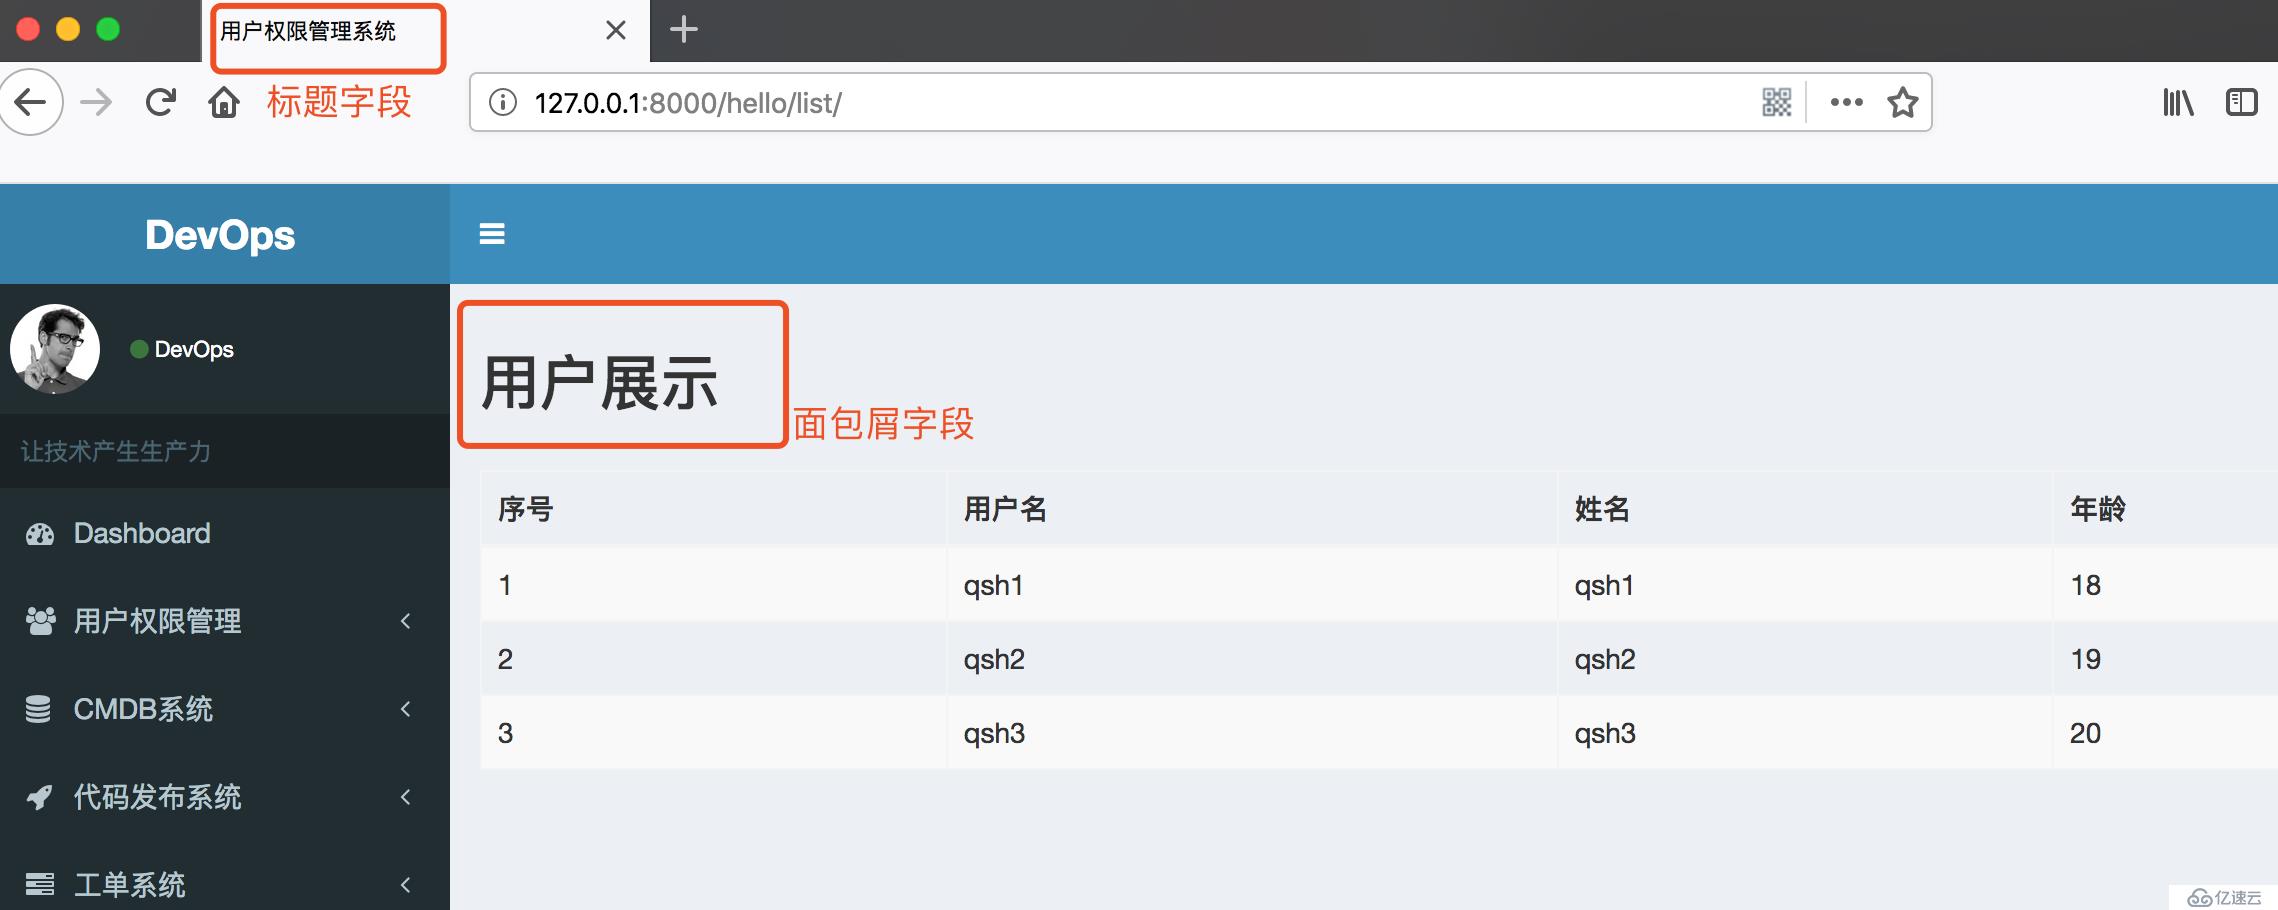
$ cat users/models.py

from django.db import models
from django.contrib.auth.models import AbstractUser

#UserProfile会被初始化为数据库表名(users_userprofile)
class UserProfile(AbstractUser):
    name_cn = models.CharField('中文名', max_length=30)
    phone = models.CharField('手机', max_length=11, null=True, blank=True)

    class Meta:
        verbose_name = '用户信息'
        verbose_name_plural = verbose_name      # 让后台显示为'用户信息'

        def __str__(self):
return self.username$ cat settings.py
ROOT_URLCONF = 'devops.urls'
AUTH_USER_MODEL = 'users.UserProfile'python manage.py makemigrations
python manage.py migrate
打通MTV
$ cat devops/urls.py

from django.contrib import admin
from django.urls import path,include

urlpatterns = [
    path('admin/', admin.site.urls),
    path('users/', include('users.urls')),
]
$ cat users/urls.py
from django.urls import path, re_path
from . import views
app_name = 'users'
urlpatterns = [
path('userlist/', views.userlist, name = 'userlist'),
]$ cat users/views.py
from django.shortcuts import render
from users.models import UserProfile
def userlist(request,*args,**kwargs):
#从.models 中获取表中所有数据
users = UserProfile.objects.all()
print(users,type(users)) # <QuerySet [<UserProfile: admin>, <UserProfile: qsh2>, <UserProfile: qsh3>, <UserProfile: qsh4>, <UserProfile: qsh5>]> <class 'django.db.models.query.QuerySet'>
return render(request,'list1.html',{'users':users})$ cat settings.py
TEMPLATES = [
{
'BACKEND': 'django.template.backends.django.DjangoTemplates',
'DIRS': [BASE_DIR+"/templates"], # 添加模板目录
'APP_DIRS': True,
'OPTIONS': {
'context_processors': [
'django.template.context_processors.debug',
'django.template.context_processors.request',
'django.contrib.auth.context_processors.auth',
'django.contrib.messages.context_processors.messages',
],
},
},
]
STATIC_URL = '/static/'
#添加以下几行
STATICFILES_DIRS = (
os.path.join(BASE_DIR, "static"),
)$ cat list1.html
{% extends 'base.html' %}
{% block title %}
用户展示
{% endblock %}
{% block breadcrunb %}
<h3>用户展示</h3>
{% endblock %}
{% block content %}
<table class="table table-striped table-hover table-bordered">
<thead>
<tr>
<th>序号</th>
<th>用户名</th>
<th>姓名</th>
<th>手机号</th>
</tr>
</thead>
<tbody>
{% for user in users %}
<tr>
<td>{{ forloop.counter }}</td>
<td>{{ user.username }}</td>
<td>{{ user.name_cn }}</td>
<td>{{ user.phone }}</td>
</tr>
{% endfor %}
</tbody>
</table>
{% endblock %}
用户登录第一版——FBV+数据库
$ cat devops/urls.py

urlpatterns = [
    #访问根路径走 users.urls 路由规则
    path('', include('users.urls')),
        ]
$ cat users/urls.py
from django.urls import path,re_path
from . import views
app_name = 'users'
urlpatterns = [
path("login/", views.login, name='login'),
]$ cat users/views.py
from django.http import HttpResponse, QueryDict, HttpResponseRedirect
from django.shortcuts import render
from .models import UserProfile
# 引入密码加密模块,Django框架自带的一套加密方法
from django.contrib.auth.hashers import make_password
def login(request, **kwargs):
data = ""
if request.method == "POST":
username = request.POST.get('username','qsh')
passwd = request.POST.get('password','123456')
#user = UserProfile.objects # users.UserProfile.objects
user = models.UserProfile.objects.filter(username=username).first()
print('user:', user,user.password) # user: qsh2 pbkdf2_sha256$150000$44dU9PmGegDb$Yv95GU+eFy9Yw/DwinEaOP6fH8nCkQ0ElAUxMfDoR8c=
print('make_password',make_password(passwd)) # 给输入的密码加密后字符
if user:
# 如果数据库查询出来的密码(密文)和输入密码匹配(make_password模块加密)
if user.password == make_password(passwd):
return HttpResponseRedirect("/userlist/")
else:
data = "your passwd is wrong"
else:
data = "user is not exist"
return render(request, 'login.html', {'data':data})
if request.method == "GET":
return render(request, 'login.html', {'data':data})$ cat templates/login.html
<form action="{% url 'users:login' %}" method="post">
<!--用户名-->
<div class="form-group has-feedback">
<input name="username" type="text" class="form-control" placeholder="用户名">
{% if forms.username.errors %}
<span >{{ forms.username.errors }}</span>
{% endif %}
</div>
<!--密码-->
<div class="form-group has-feedback">
<input name="password" type="password" class="form-control" placeholder="密码">
{% if forms.password.errors %}
<span >{{ forms.password.errors }}
</div></span>
{% endif %}
<!--错误信息及登陆-->
<div class="row">
<div class="col-xs-8">
<span id="errors" >{% if data %} {{ data }} {% else %} {% endif %}</span>
</div>
<div class="col-xs-4">
<button type="submit" class="btn btn-primary btn-block btn-flat">登录</button>
</div>
</div>
</form>
第二个版本 引入CBV view (与历史无半点关系,从头来过)
$ cat devops/urls.py

from django.contrib import admin
from django.urls import path, re_path, include

urlpatterns = [
    path('admin/', admin.site.urls),
    path("", include('users.urls1')),
]
$ cat users/urls1.py
from django.urls import path, re_path
from users import views1
app_name = 'users'
urlpatterns = [
# http://ip:8000/
path("", views1.IndexView.as_view(), name='index'),
# http://ip:8000/login/
path("login/", views1.LoginView.as_view(), name='login'),
# http://ip:8000/logout/
path("logout/", views1.LogoutView.as_view(), name='logout'),
path("userlist/",views.userlist, name='userlist'),
] $ cat users/views1.py
from django.views.generic import View
from django.shortcuts import render
from django.http import HttpResponseRedirect
from django.contrib.auth import authenticate, login, logout
from django.urls import reverse
class IndexView(View):
     """
     首页
     """
     def get(self, request):
         return render(request, 'list1.html')
class LoginView(View):
"""
登录模块
"""
def get(self, request):
return render(request, "login.html")
def post(self, request):
username = request.POST.get("username", None)
password = request.POST.get("password", None)
print(username)
user = authenticate(username=username, password=password)
print(user)
if user:
if user.is_active:
# 默认为当前登录用户创建session
login(request, user)
# 登录成功则跳到首页
# return HttpResponseRedirect('/')
# 命名空间的写法
return HttpResponseRedirect(reverse("users:userlist"))
else:
return render(request, "login.html", {"msg": "用户未激活!"})
else:
return render(request, "login.html", {"msg": "用户名或密码错误!"})
class LogoutView(View):
"""
登出功能
"""
def get(self, request):
logout(request)
return HttpResponseRedirect(reverse("users:login")) 实现效果
用户认证版本迭代
class IndexView(View):
"""
首页
"""
def get(self, request):
return render(request, 'list1.html')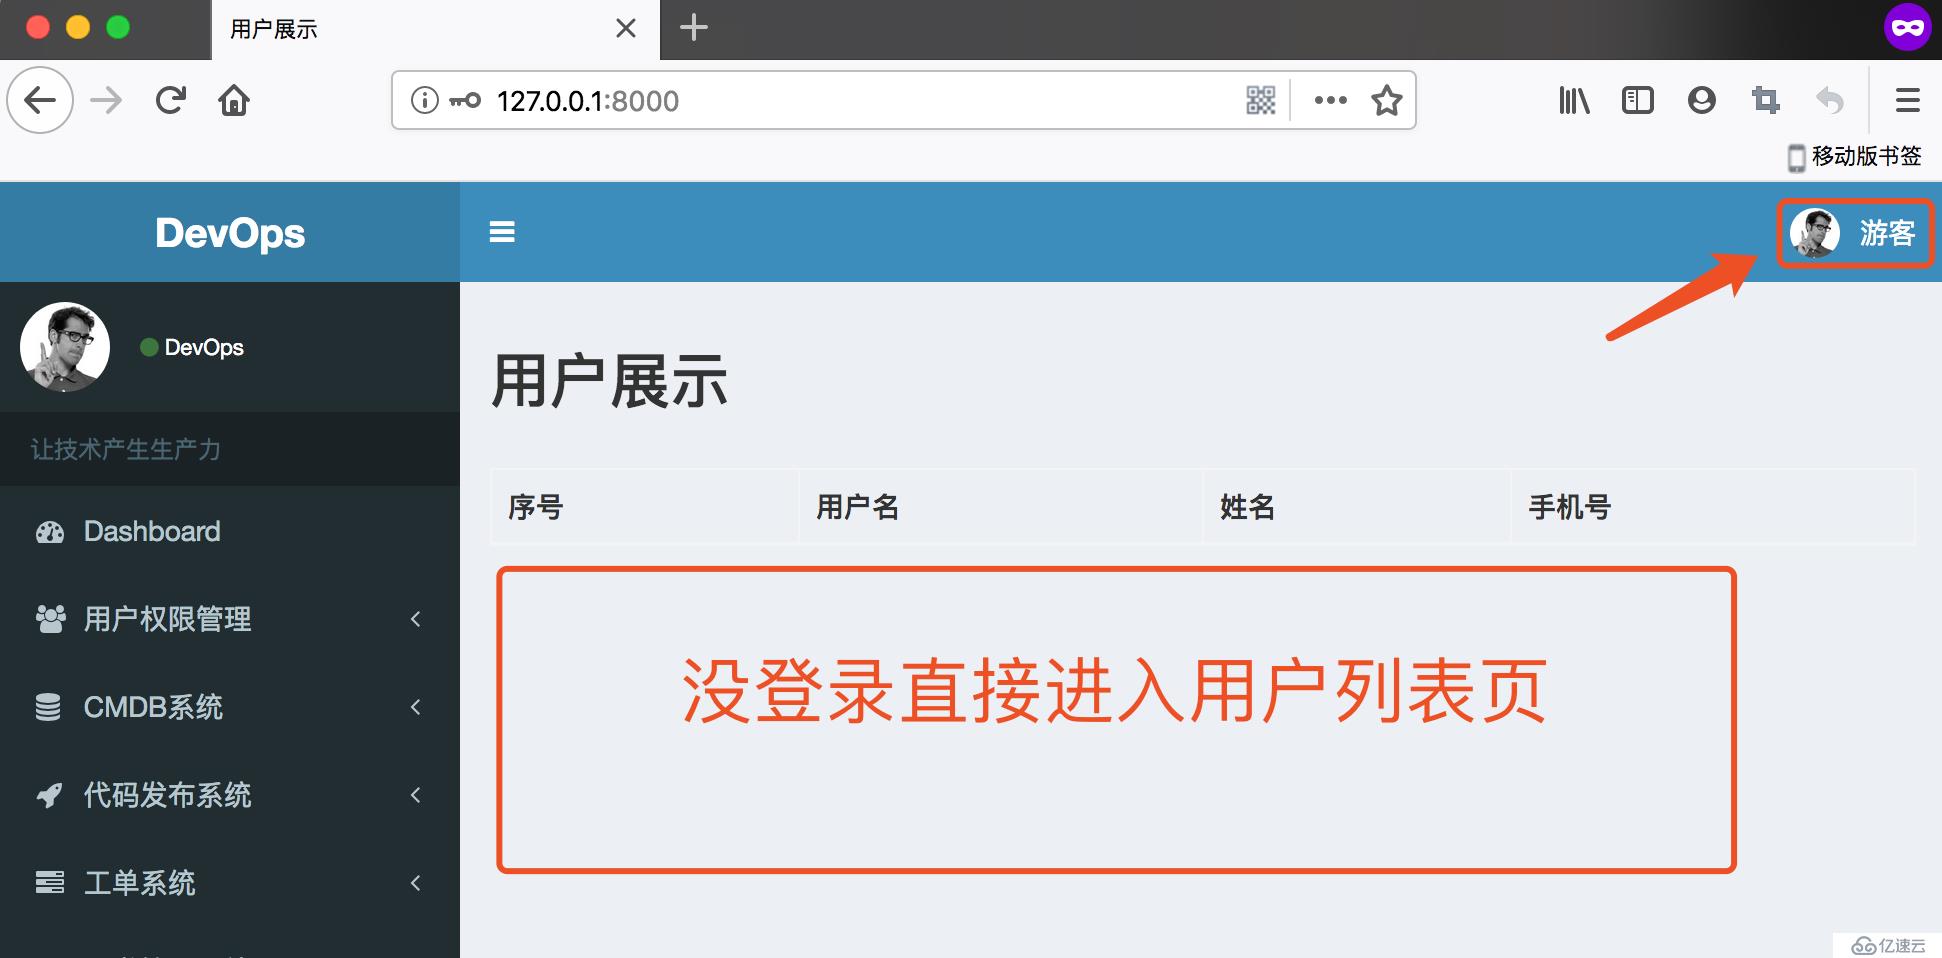
class IndexView(View):
    """
    首页
    """
    def get(self, request):
        if not request.user.is_authenticated:
            return HttpResponseRedirect(reverse("users:login"))
        return render(request, 'list1.html')
没登录不会进入用户列表页,而是跳转到登录页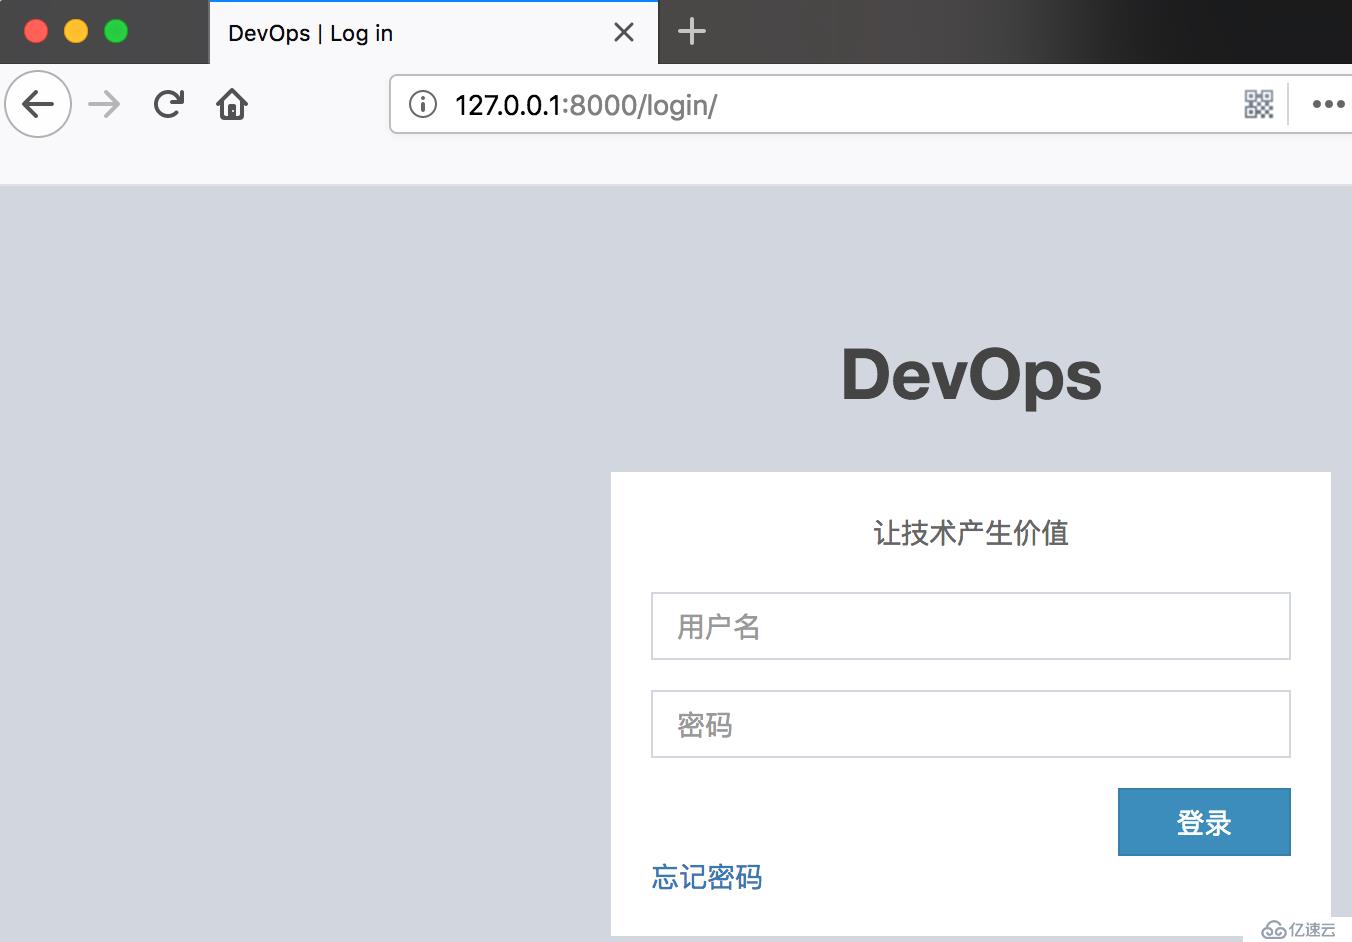
# CBV应用装饰器, django的bug,不能直接对类进行装饰,必须使用 method_decorator,把装饰器当作参数传进去。
from django.utils.decorators import method_decorator
from django.contrib.auth import authenticate, login, logout,decorators

class IndexView(View):
     """
     首页
     """
     # login_url 用户没有通过测试时跳转的地址,默认是 settings.LOGIN_URL
     @method_decorator(decorators.login_required(login_url='/login/'))
     def get(self, request):
         return render(request, 'list1.html')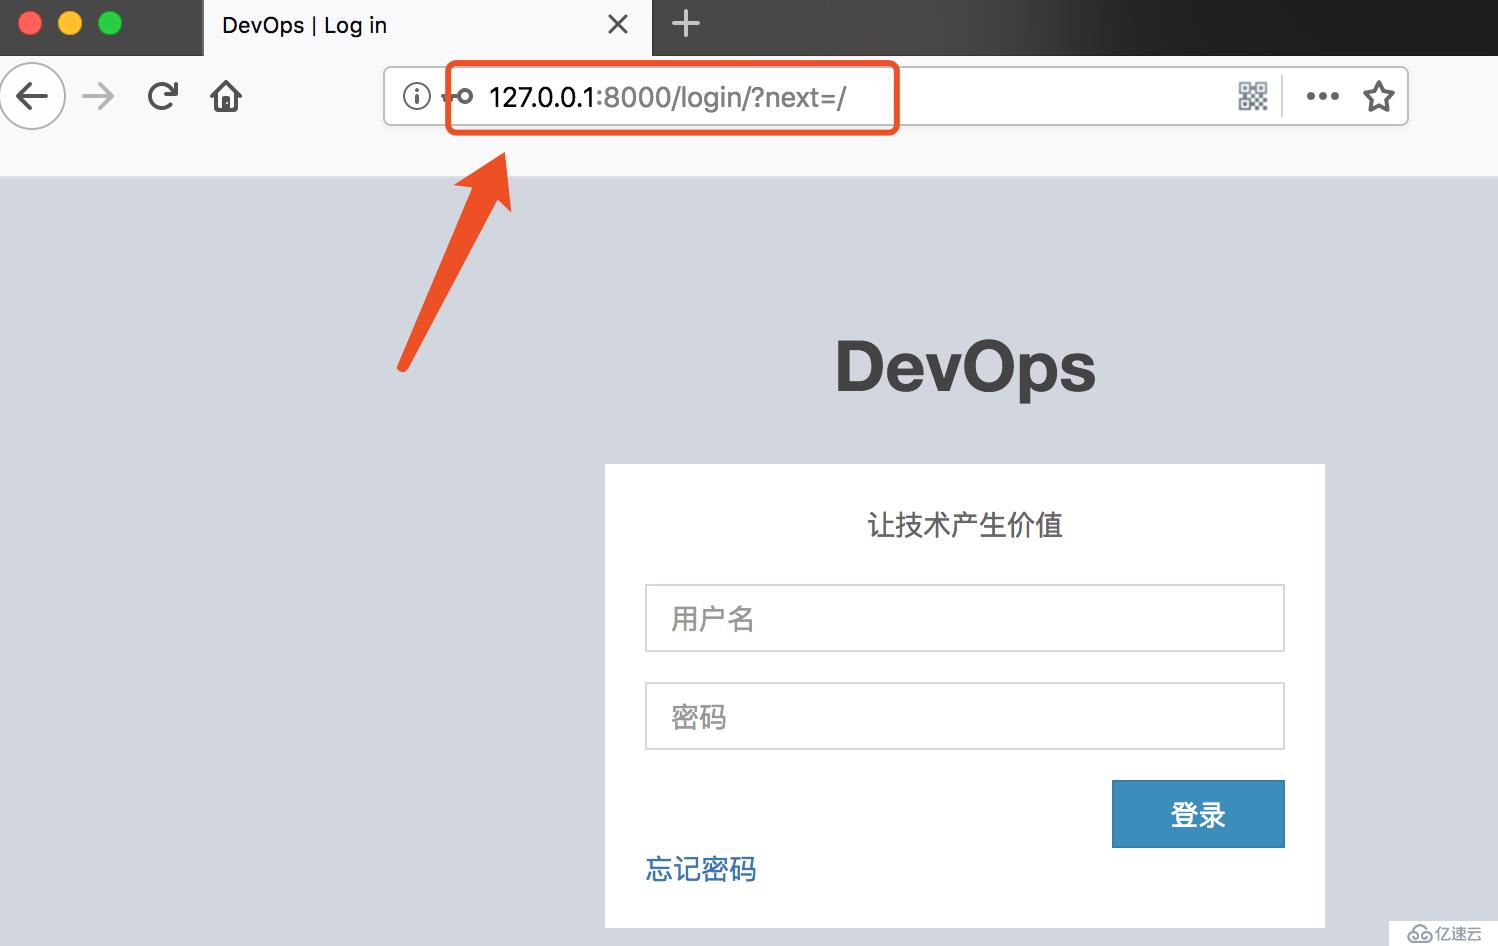
from django.contrib.auth.mixins import LoginRequiredMixin

# LoginRequiredMixin验证用户
class IndexView(LoginRequiredMixin, View):
    """
    首页
    """
    # 用户没有通过或者权限不够时跳转的地址,默认是 settings.LOGIN_URL.
    login_url = '/login/'
    # 把没通过检查的用户重定向到没有 "next page" 的非登录页面时,把它设置为 None ,这样它会在 URL 中移除。
    redirect_field_name = 'redirect_to'   # http://127.0.0.1:8000/login/?redirect_to=/

    def get(self, request):
        return render(request, 'list1.html')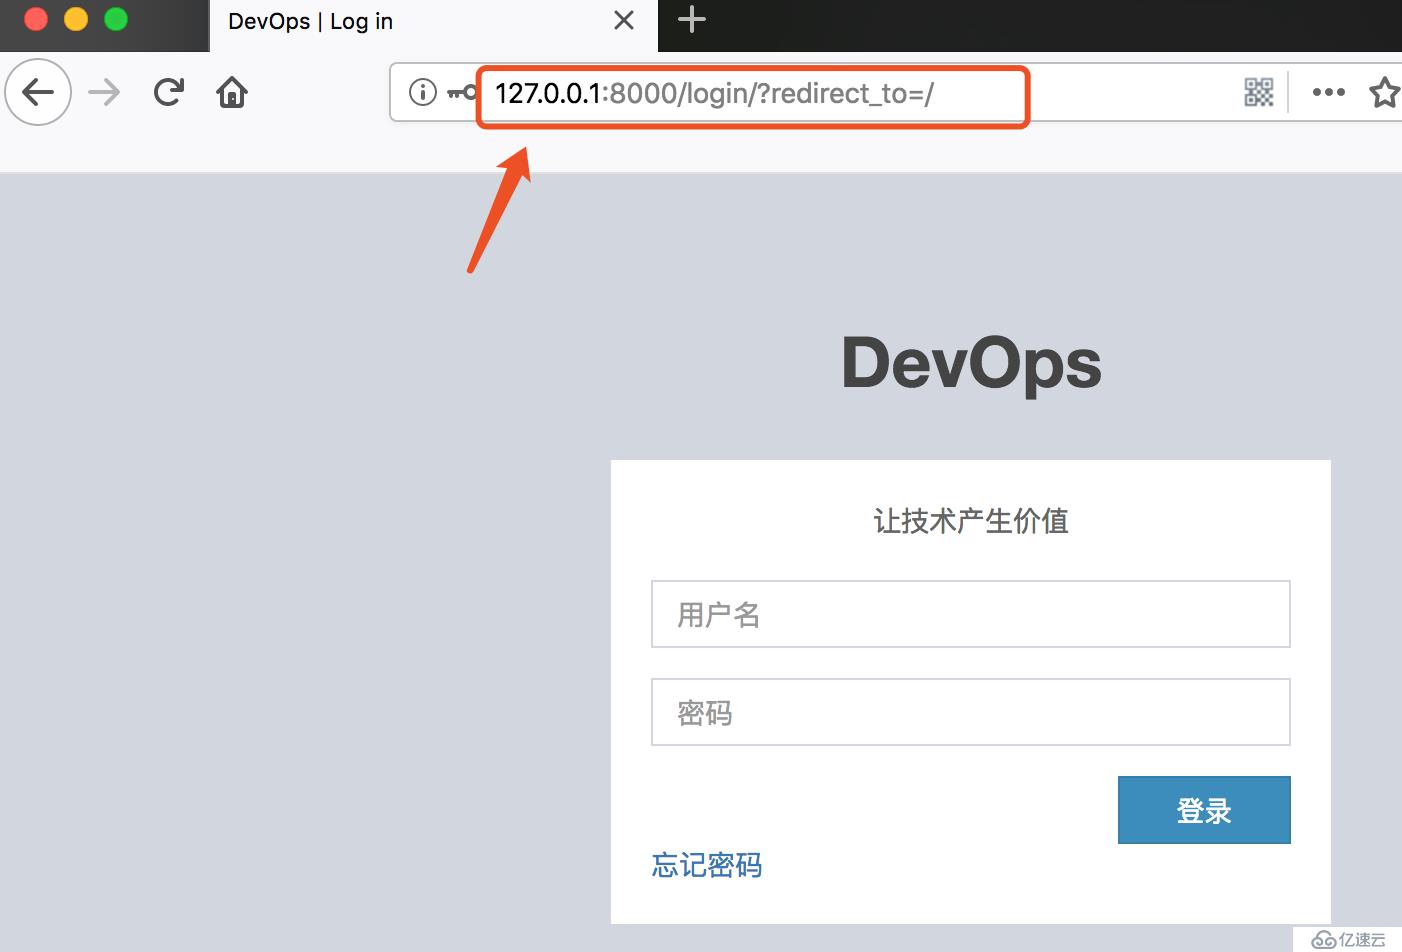
免责声明:本站发布的内容(图片、视频和文字)以原创、转载和分享为主,文章观点不代表本网站立场,如果涉及侵权请联系站长邮箱:is@yisu.com进行举报,并提供相关证据,一经查实,将立刻删除涉嫌侵权内容。