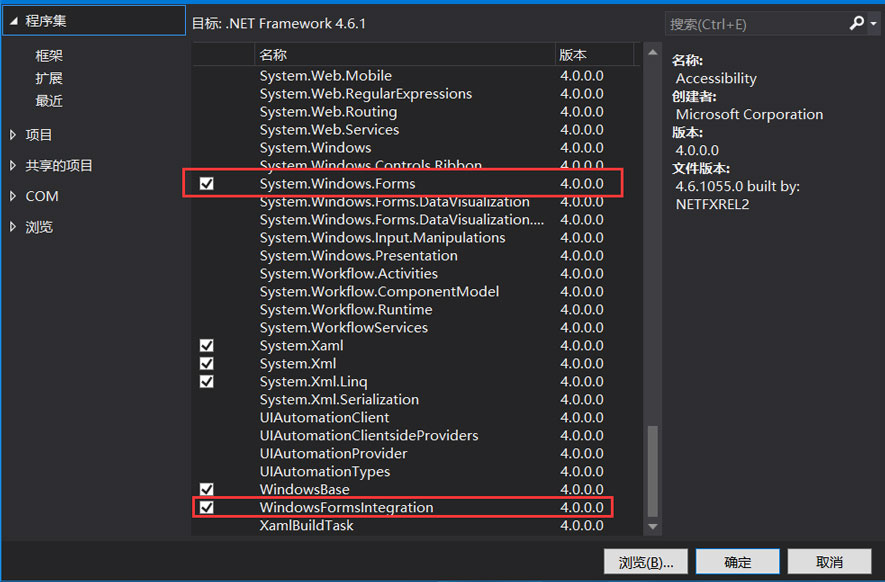
您好,登录后才能下订单哦!
密码登录
登录注册
点击 登录注册 即表示同意《亿速云用户服务条款》
本篇内容主要讲解“WPF怎么使用AForge调用摄像头”,感兴趣的朋友不妨来看看。本文介绍的方法操作简单快捷,实用性强。下面就让小编来带大家学习“WPF怎么使用AForge调用摄像头”吧!

.xaml文件中,添加以下命名空间:
        xmlns:wfi ="clr-namespace:System.Windows.Forms.Integration;assembly=WindowsFormsIntegration"
        xmlns:aforge="clr-namespace:AForge.Controls;assembly=AForge.Controls
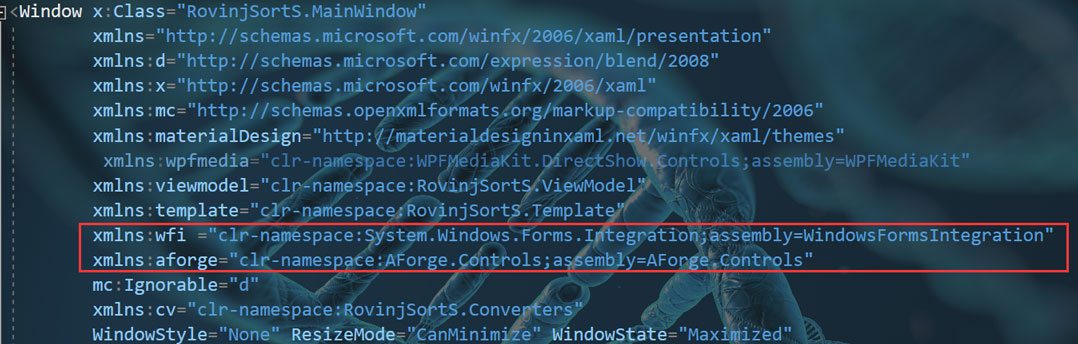
为XAML中添加一个WindowsFormsHost 嵌入一个VideoSourcePlayer
 <wfi:WindowsFormsHost >
   <aforge:VideoSourcePlayer x:Name="player" Dock="Fill" />
 </wfi:WindowsFormsHost>
在后台代码中, 添加初始化代码, 以下代码模拟设置的第一个摄像头, FilterInfoCollection实际为一个集合。
FilterInfoCollection videoDevices = new FilterInfoCollection(FilterCategory.VideoInputDevice);
if (videoDevices.Count > 0)
{
var videoDevice = new VideoCaptureDevice(videoDevices[0].MonikerString);
videoDevice.VideoResolution = videoDevice.VideoCapabilities[0]; //设置分辨率
player.VideoSource = videoDevice; //设置源
player.Start(); //启动
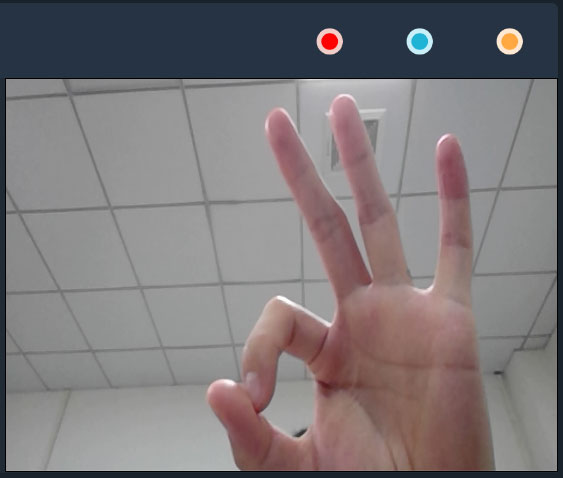
}实际效果(演示):
player.GetCurrentVideoFrame();
到此,相信大家对“WPF怎么使用AForge调用摄像头”有了更深的了解,不妨来实际操作一番吧!这里是亿速云网站,更多相关内容可以进入相关频道进行查询,关注我们,继续学习!
免责声明:本站发布的内容(图片、视频和文字)以原创、转载和分享为主,文章观点不代表本网站立场,如果涉及侵权请联系站长邮箱:is@yisu.com进行举报,并提供相关证据,一经查实,将立刻删除涉嫌侵权内容。