您好,登录后才能下订单哦!
密码登录
登录注册
点击 登录注册 即表示同意《亿速云用户服务条款》
这篇文章将为大家详细讲解有关Python+PyQt5如何制作一个图片查看器,小编觉得挺实用的,因此分享给大家做个参考,希望大家阅读完这篇文章后可以有所收获。
一个最基本的照片查看器应该具有以下功能:
载入图像
缩放图像
在窗口尺寸小于图像时允许拖拽图像
载入图像可以使用 QGraphicsPixmapItem 来解决,缩放图像使用 QGraphicsView 的 scale(sx, sy) 解决,移动图像只需将 QGraphicsView 的 dragMode 设置为 QGraphicsView.ScrollHandDrag 即可。因为常常使用鼠标滚轮来缩放图像,所以还需要重写重写以下 QGraphicsView 的 wheelEvent。
实际上由于窗口的缩放导致视口大小变化,还有一些细枝末节需要处理。具体代码如下:
# coding:utf-8
import sys

from PyQt5.QtCore import QRect, QRectF, QSize, Qt
from PyQt5.QtGui import QPainter, QPixmap, QWheelEvent
from PyQt5.QtWidgets import (QApplication, QGraphicsItem, QGraphicsPixmapItem,
                             QGraphicsScene, QGraphicsView)


class ImageViewer(QGraphicsView):
    """ 图片查看器 """

    def __init__(self, parent=None):
        super().__init__(parent=parent)
        self.zoomInTimes = 0
        self.maxZoomInTimes = 22

        # 创建场景
        self.graphicsScene = QGraphicsScene()

        # 图片
        self.pixmap = QPixmap(r'D:\hzz\图片\硝子\硝子 (2).jpg')
        self.pixmapItem = QGraphicsPixmapItem(self.pixmap)
        self.displayedImageSize = QSize(0, 0)

        # 初始化小部件
        self.__initWidget()

    def __initWidget(self):
        """ 初始化小部件 """
        self.resize(1200, 900)

        # 隐藏滚动条
        self.setVerticalScrollBarPolicy(Qt.ScrollBarAlwaysOff)
        self.setHorizontalScrollBarPolicy(Qt.ScrollBarAlwaysOff)

        # 以鼠标所在位置为锚点进行缩放
        self.setTransformationAnchor(self.AnchorUnderMouse)

        # 平滑缩放
        self.pixmapItem.setTransformationMode(Qt.SmoothTransformation)
        self.setRenderHints(QPainter.Antialiasing |
                            QPainter.SmoothPixmapTransform)

        # 设置场景
        self.graphicsScene.addItem(self.pixmapItem)
        self.setScene(self.graphicsScene)

    def wheelEvent(self, e: QWheelEvent):
        """ 滚动鼠标滚轮缩放图片 """
        if e.angleDelta().y() > 0:
            self.zoomIn()
        else:
            self.zoomOut()

    def resizeEvent(self, e):
        """ 缩放图片 """
        super().resizeEvent(e)

        if self.zoomInTimes > 0:
            return

        # 调整图片大小
        ratio = self.__getScaleRatio()
        self.displayedImageSize = self.pixmap.size()*ratio
        if ratio < 1:
            self.fitInView(self.pixmapItem, Qt.KeepAspectRatio)
        else:
            self.resetTransform()

    def setImage(self, imagePath: str):
        """ 设置显示的图片 """
        self.resetTransform()

        # 刷新图片
        self.pixmap = QPixmap(imagePath)
        self.pixmapItem.setPixmap(self.pixmap)

        # 调整图片大小
        self.setSceneRect(QRectF(self.pixmap.rect()))
        ratio = self.__getScaleRatio()
        self.displayedImageSize = self.pixmap.size()*ratio
        if ratio < 1:
            self.fitInView(self.pixmapItem, Qt.KeepAspectRatio)

    def resetTransform(self):
        """ 重置变换 """
        super().resetTransform()
        self.zoomInTimes = 0
        self.__setDragEnabled(False)

    def __isEnableDrag(self):
        """ 根据图片的尺寸决定是否启动拖拽功能 """
        v = self.verticalScrollBar().maximum() > 0
        h = self.horizontalScrollBar().maximum() > 0
        return v or h

    def __setDragEnabled(self, isEnabled: bool):
        """ 设置拖拽是否启动 """
        self.setDragMode(
            self.ScrollHandDrag if isEnabled else self.NoDrag)

    def __getScaleRatio(self):
        """ 获取显示的图像和原始图像的缩放比例 """
        if self.pixmap.isNull():
            return 1

        pw = self.pixmap.width()
        ph = self.pixmap.height()
        rw = min(1, self.width()/pw)
        rh = min(1, self.height()/ph)
        return min(rw, rh)

    def fitInView(self, item: QGraphicsItem, mode=Qt.KeepAspectRatio):
        """ 缩放场景使其适应窗口大小 """
        super().fitInView(item, mode)
        self.displayedImageSize = self.__getScaleRatio()*self.pixmap.size()
        self.zoomInTimes = 0

    def zoomIn(self, viewAnchor=QGraphicsView.AnchorUnderMouse):
        """ 放大图像 """
        if self.zoomInTimes == self.maxZoomInTimes:
            return

        self.setTransformationAnchor(viewAnchor)

        self.zoomInTimes += 1
        self.scale(1.1, 1.1)
        self.__setDragEnabled(self.__isEnableDrag())

        # 还原 anchor
        self.setTransformationAnchor(self.AnchorUnderMouse)

    def zoomOut(self, viewAnchor=QGraphicsView.AnchorUnderMouse):
        """ 缩小图像 """
        if self.zoomInTimes == 0 and not self.__isEnableDrag():
            return

        self.setTransformationAnchor(viewAnchor)

        self.zoomInTimes -= 1

        # 原始图像的大小
        pw = self.pixmap.width()
        ph = self.pixmap.height()

        # 实际显示的图像宽度
        w = self.displayedImageSize.width()*1.1**self.zoomInTimes
        h = self.displayedImageSize.height()*1.1**self.zoomInTimes

        if pw > self.width() or ph > self.height():
            # 在窗口尺寸小于原始图像时禁止继续缩小图像比窗口还小
            if w <= self.width() and h <= self.height():
                self.fitInView(self.pixmapItem)
            else:
                self.scale(1/1.1, 1/1.1)
        else:
            # 在窗口尺寸大于图像时不允许缩小的比原始图像小
            if w <= pw:
                self.resetTransform()
            else:
                self.scale(1/1.1, 1/1.1)

        self.__setDragEnabled(self.__isEnableDrag())

        # 还原 anchor
        self.setTransformationAnchor(self.AnchorUnderMouse)


if __name__ == '__main__':
    app = QApplication(sys.argv)
    w = ImageViewer()
    w.show()
    sys.exit(app.exec_())
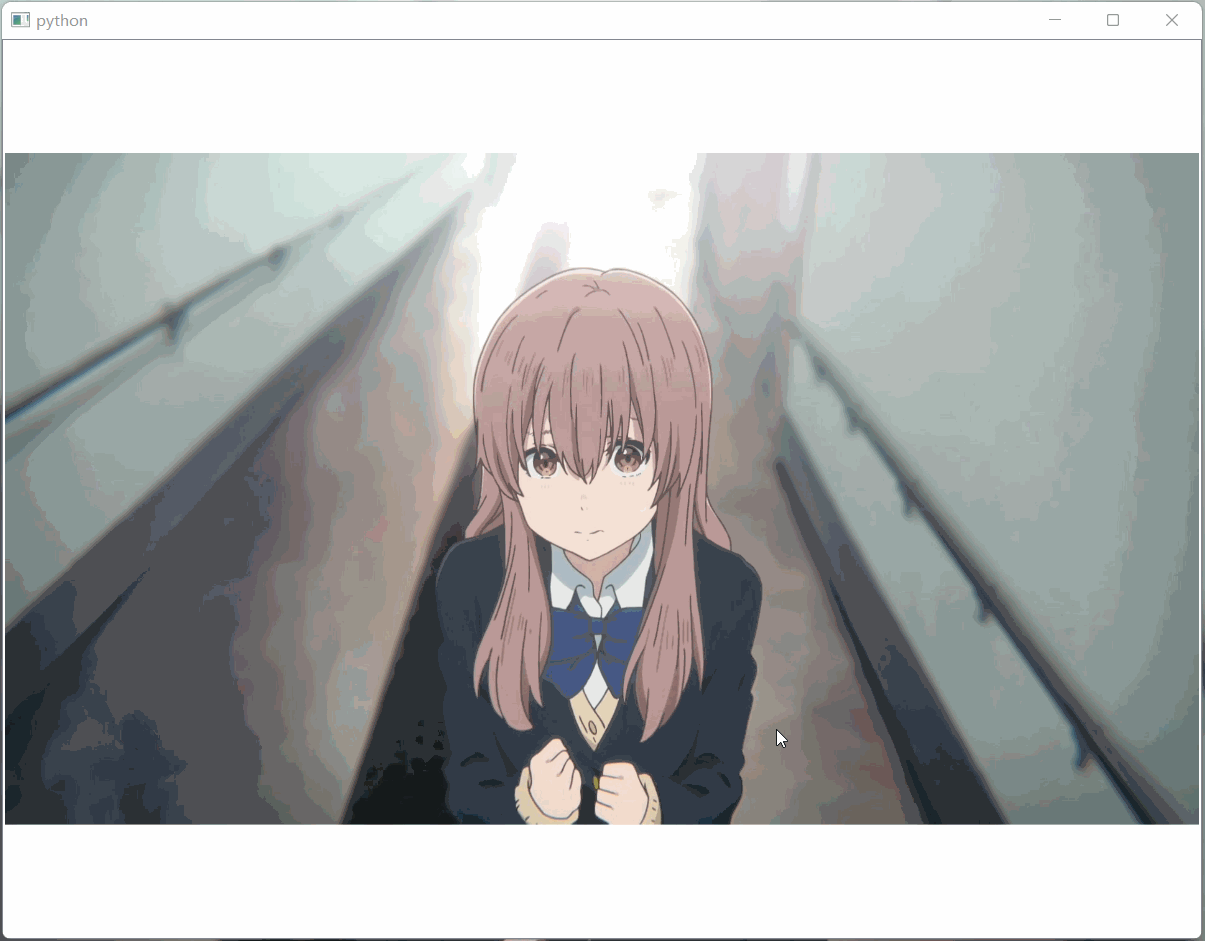
来看一下实际的使用效果:
关于“Python+PyQt5如何制作一个图片查看器”这篇文章就分享到这里了,希望以上内容可以对大家有一定的帮助,使各位可以学到更多知识,如果觉得文章不错,请把它分享出去让更多的人看到。
免责声明:本站发布的内容(图片、视频和文字)以原创、转载和分享为主,文章观点不代表本网站立场,如果涉及侵权请联系站长邮箱:is@yisu.com进行举报,并提供相关证据,一经查实,将立刻删除涉嫌侵权内容。