您好,登录后才能下订单哦!
密码登录
登录注册
点击 登录注册 即表示同意《亿速云用户服务条款》
这篇文章主要讲解了“怎么用小程序实现轮播图”,文中的讲解内容简单清晰,易于学习与理解,下面请大家跟着小编的思路慢慢深入,一起来研究和学习“怎么用小程序实现轮播图”吧!
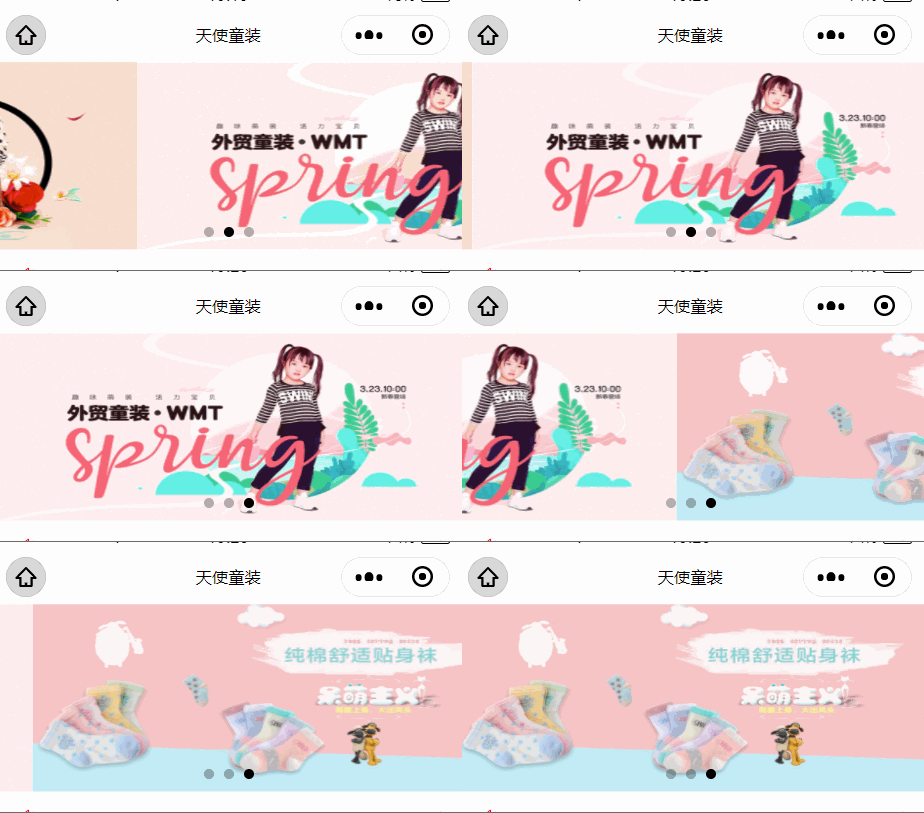
那个先上效果:

step1:页面index.wxml代码
<!-- 轮播 -->
<swiper class='u-wrp-bnr' indicator-dots='true' autoplay='true' interval='5000' duration='1000' circular='true'>
    <block wx:for="{{bnrUrl}}" wx:for-index="index" wx:key="index">
        <swiper-item>
            <image src='{{item.image}}' class='u-img-slide' ></image>
        </swiper-item>
    </block>
</swiper>
step2:配置信息也就是index.js
Page({
  data: {
    bnrUrl: [],
  },
  onLoad: function () {
    // 轮播
    wx.request({
      url: 'https://locally.uieee.com/slides',
      success (res) {
    // console.log(res.data)
      this.setData({
        icons:res.data
      })
   })
})
step3:样式文件 index.wxss
/* 轮播 */
.u-wrp-bnr {
  width: 100%;
  height: 300rpx;
  display: block;
  position: relative;
  /* top: rpx; */
  background: #f0f0f0;
}
.u-img-slide {
  width: 100%;
  height: inherit;
  /* 继承夫类的高 */
}
然后就是wx.require({})中传递一个对象,这个对象的属性分别对应不同的含义
wx.request({
  url: 'test.php', //仅为示例,并非真实的接口地址
  data: {
    x: '',
    y: ''
  },
  header: {
    'content-type': 'application/json' // 默认值
  },
  success (res) {
    console.log(res.data)
  }
})
下面解释一下:
url:请求地址,必填
data:请求的参数
method:HTTP 请求方法,默认为get
dataType:返回的数据格式,默认为json
success:接口调用成功的回调函数
fail:接口调用失败的回调函数
complete:接口调用结束的回调函数(调用成功、失败都会执行)
感谢各位的阅读,以上就是“怎么用小程序实现轮播图”的内容了,经过本文的学习后,相信大家对怎么用小程序实现轮播图这一问题有了更深刻的体会,具体使用情况还需要大家实践验证。这里是亿速云,小编将为大家推送更多相关知识点的文章,欢迎关注!
免责声明:本站发布的内容(图片、视频和文字)以原创、转载和分享为主,文章观点不代表本网站立场,如果涉及侵权请联系站长邮箱:is@yisu.com进行举报,并提供相关证据,一经查实,将立刻删除涉嫌侵权内容。