您好,登录后才能下订单哦!
密码登录
登录注册
点击 登录注册 即表示同意《亿速云用户服务条款》
这篇文章主要介绍“微信小程序音频录制波纹循环动画怎么实现”,在日常操作中,相信很多人在微信小程序音频录制波纹循环动画怎么实现问题上存在疑惑,小编查阅了各式资料,整理出简单好用的操作方法,希望对大家解答”微信小程序音频录制波纹循环动画怎么实现”的疑惑有所帮助!接下来,请跟着小编一起来学习吧!
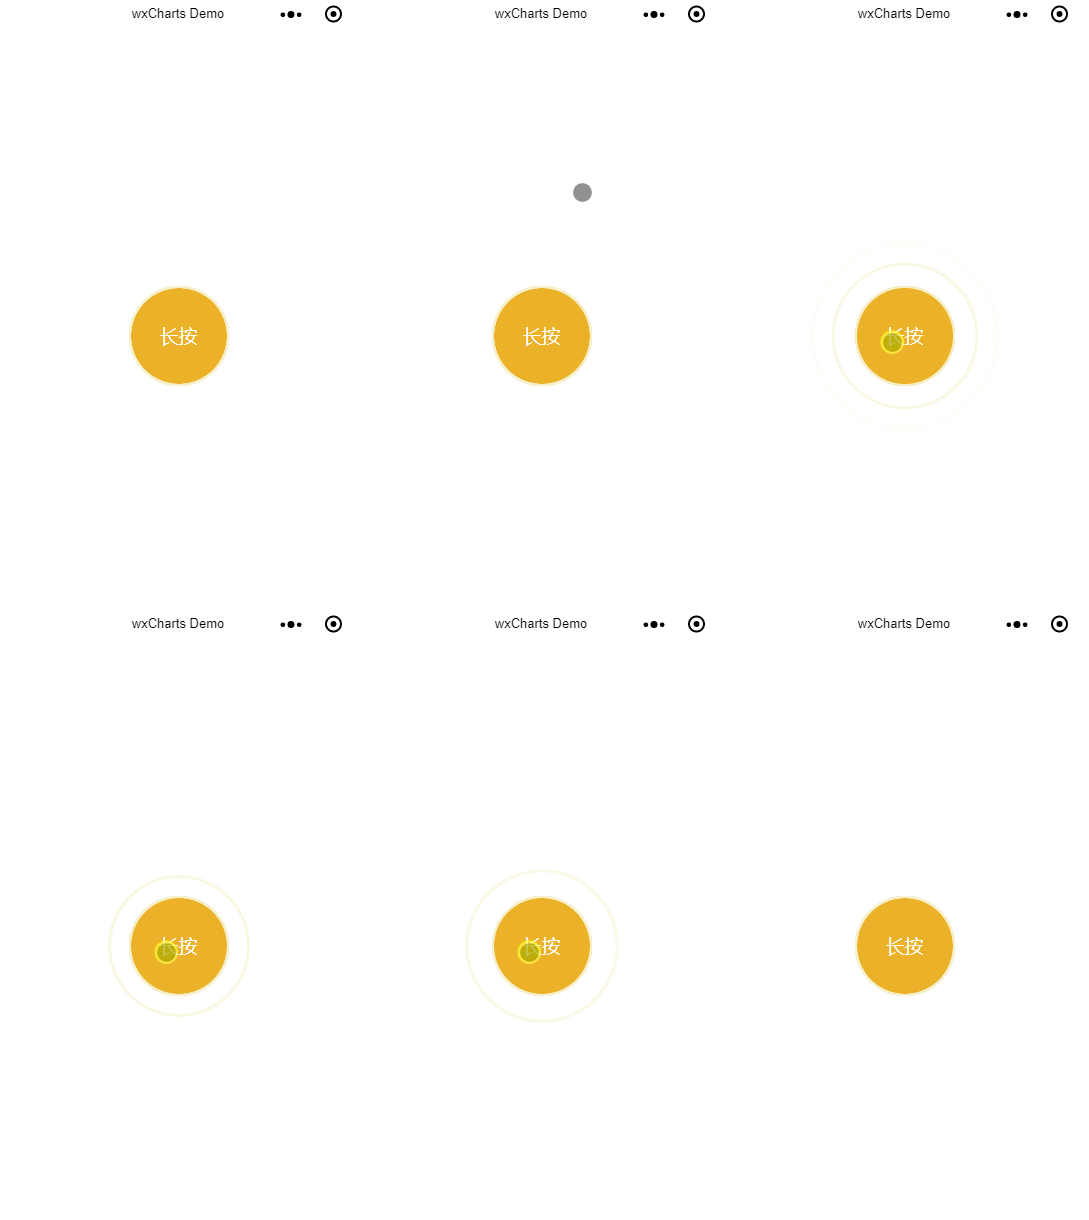
实现的效果

第一种方法(利用微信小程序的animation)
wxml部分
<!--pages/myRecode/myRecode.wxml-->
<view class="myRecode">
  <view class="recode" bindtouchstart='recodeClick' bindtouchend='recodeEnd'>
    <text>长按</text>
    <view class="ripple"></view>
    <view class="ripple" animation="{{animationData1}}"></view>
    <view class="ripple" animation="{{animationData2}}"></view>
  </view>
</view>
wxss部分
/* pages/myRecode/myRecode.wxss */
.myRecode{
  padding-top:500rpx;
  text-align: center;
  box-sizing: border-box;
}
.myRecode .recode{
  display: inline-block;
  width:200rpx;
  height:200rpx;
  background: #EBB128;
  border-radius: 50%;
  text-align: center;
  color:#fff;
  line-height: 200rpx;
  position: relative;
}
.ripple{
  position: absolute;
  top:0;
  left:0;
  right:0;
  bottom:0;
  border-radius: 50%;
  border:2px solid #F6F1CC;
}
js 部分
// pages/myRecode/myRecode.js
Page({

  /**
   * 页面的初始数据
   */
  data: {
    animationData1: "",
    animationData2: "",
    animationStatus: false
  },

  /**
   * 生命周期函数--监听页面加载
   */
  onLoad: function(options) {

  },

  /**
   * 生命周期函数--监听页面初次渲染完成
   */
  onReady: function() {

  },

  /**
   * 生命周期函数--监听页面显示
   */
  onShow: function() {

  },

  /**
   * 生命周期函数--监听页面隐藏
   */
  onHide: function() {

  },

  /**
   * 生命周期函数--监听页面卸载
   */
  onUnload: function() {

  },

  /**
   * 页面相关事件处理函数--监听用户下拉动作
   */
  onPullDownRefresh: function() {

  },

  /**
   * 页面上拉触底事件的处理函数
   */
  onReachBottom: function() {

  },

  /**
   * 用户点击右上角分享
   */
  onShareAppMessage: function() {

  },
  //事件函数
  animationFun:function(animationData){
    if(!this.data.animationStatus){
      return
    }
    var animation = wx.createAnimation({
      duration: 1000
    })
    animation.opacity(0).scale(2, 2).step();
    this.setData({
      [`${animationData}`]: animation.export()
    })
  },
  animationEnd: function (animationData) {
    var animation = wx.createAnimation({
      duration: 0
    })
    animation.opacity(1).scale(1, 1).step();
    this.setData({
      [`${animationData}`]: animation.export()
    })
  },
  recodeEnd: function() {
    //动画1结束
    var animation1 = wx.createAnimation({
      duration: 0
    })
    animation1.opacity(1).scale(1, 1).step();
    //动画2结束
    var animation2 = wx.createAnimation({
      duration: 0
    })
    animation2.opacity(1).scale(1, 1).step();
    this.setData({
      animationData1: animation1.export(),
      animationData2: animation2.export(),
      animationStatus: false
    })
  },
  recodeClick: function() {
    this.setData({
      animationStatus: true
    })
    this.animationFun('animationData1')
    setTimeout(()=>{
      this.animationFun('animationData2')
    },500)
    setTimeout(() => {
      this.animationRest()
    }, 1000)
  },
  animationRest: function() {
    //动画重置
    this.animationEnd('animationData1')
    setTimeout(()=>{
      this.animationEnd('animationData2')
    },500)
    setTimeout(() => {
      if (this.data.animationStatus) {
        this.recodeClick()
      }
    }, 100)

  }
})第二种方法(纯wxss控制)
wxml
<!--pages/myRecode/myRecode.wxml-->
<view class="myRecode">
  <view class="recode" bindtouchstart='recodeClick' bindtouchend='recodeEnd'>
    <text>长按</text>
    <view class="ripple"></view>
    <view class="ripple {{animationStatus?'rippleAnimation1':''}}"></view>
    <view class="ripple {{animationStatus?'rippleAnimation2':''}}"></view>
    <view class="ripple {{animationStatus?'rippleAnimation3':''}}"></view>
  </view>
</view>
js
// pages/myRecode/myRecode.js
Page({

  /**
   * 页面的初始数据
   */
  data: {
    animationStatus: false
  },

  /**
   * 生命周期函数--监听页面加载
   */
  onLoad: function(options) {

  },

  /**
   * 生命周期函数--监听页面初次渲染完成
   */
  onReady: function() {

  },

  /**
   * 生命周期函数--监听页面显示
   */
  onShow: function() {

  },

  /**
   * 生命周期函数--监听页面隐藏
   */
  onHide: function() {

  },

  /**
   * 生命周期函数--监听页面卸载
   */
  onUnload: function() {

  },

  /**
   * 页面相关事件处理函数--监听用户下拉动作
   */
  onPullDownRefresh: function() {

  },

  /**
   * 页面上拉触底事件的处理函数
   */
  onReachBottom: function() {

  },

  /**
   * 用户点击右上角分享
   */
  onShareAppMessage: function() {

  },
  recodeEnd: function() {
    this.setData({
      animationStatus:false
    })
  },
  recodeClick: function() {
    this.setData({
      animationStatus: true
    })
  }
})
wxss部分
/* pages/myRecode/myRecode.wxss */
.myRecode{
  padding-top:500rpx;
  text-align: center;
  box-sizing: border-box;
}
.myRecode .recode{
  display: inline-block;
  width:200rpx;
  height:200rpx;
  background: #EBB128;
  border-radius: 50%;
  text-align: center;
  color:#fff;
  line-height: 200rpx;
  position: relative;
}
.ripple{
  position: absolute;
  top:0;
  left:0;
  right:0;
  bottom:0;
  border-radius: 50%;
  border:2px solid #F6F1CC;
}
.rippleAnimation1{
  animation: ripple 1s infinite linear;
}
.rippleAnimation2{
  animation: ripple 1s infinite linear;
  animation-delay:0.3s;
}
.rippleAnimation3{
  animation: ripple 1s infinite linear;
  animation-delay:0.6s;
}
@keyframes ripple{
  from{
    opacity: 1;
    transform: scale(1,1)
  }
  to{
    opacity: 0;
    transform: scale(2,2)
  }
}
到此,关于“微信小程序音频录制波纹循环动画怎么实现”的学习就结束了,希望能够解决大家的疑惑。理论与实践的搭配能更好的帮助大家学习,快去试试吧!若想继续学习更多相关知识,请继续关注亿速云网站,小编会继续努力为大家带来更多实用的文章!
免责声明:本站发布的内容(图片、视频和文字)以原创、转载和分享为主,文章观点不代表本网站立场,如果涉及侵权请联系站长邮箱:is@yisu.com进行举报,并提供相关证据,一经查实,将立刻删除涉嫌侵权内容。