您好,登录后才能下订单哦!
密码登录
登录注册
点击 登录注册 即表示同意《亿速云用户服务条款》
这篇文章主要介绍“Flutter本地存储之基本的键值对存储怎么实现”的相关知识,小编通过实际案例向大家展示操作过程,操作方法简单快捷,实用性强,希望这篇“Flutter本地存储之基本的键值对存储怎么实现”文章能帮助大家解决问题。
在原生的 Android 或 iOS 中,都提供了基本的键值对存储方式,Android 是 SharedPreferences,iOS 是 NSUserDefaults。在 Flutter 中,提供了 shared_preferences 这个插件来实现本地键值对数据存储。实际上,shared_preferences 在 Android 就是使用 SharedPreferences 实现,在 iOS 上则是使用 NSUserDefaults 实现。
在 pubspec.yaml 文件中添加以下代码:
dependencies:
    flutter:
        sdk: flutter
    shared_preferences: ^2.0.18
我们将基础的计数应用修改为支持从上一次结果(即存储在本地的数值)开始增加。代码如下:
import 'package:flutter/material.dart';
import 'package:shared_preferences/shared_preferences.dart';

class MyApp extends StatefulWidget {
  @override
  _MyAppState createState() => _MyAppState();
}

class _MyAppState extends State<MyApp> {
  int _counter = 0;
  late SharedPreferences _prefs;

  @override
  void initState() {
    super.initState();
    _loadCounter();
  }

  void _loadCounter() async {
    _prefs = await SharedPreferences.getInstance();
    setState(() {
      _counter = (_prefs.getInt('counter') ?? 0);
    });
  }

  void _incrementCounter() async {
    setState(() {
      _counter++;
    });
    await _prefs.setInt('counter', _counter);
  }

  @override
  Widget build(BuildContext context) {
    return MaterialApp(
      home: Scaffold(
        appBar: AppBar(
          title: Text('Shared Preferences 示例'),
        ),
        body: Center(
          child: Column(
            mainAxisAlignment: MainAxisAlignment.center,
            children: <Widget>[
              Text(
                'You have pushed the button this many times:',
              ),
              Text(
                '$_counter',
                style: Theme.of(context).textTheme.headline4,
              ),
            ],
          ),
        ),
        floatingActionButton: FloatingActionButton(
          onPressed: _incrementCounter,
          tooltip: 'Increment',
          child: Icon(Icons.add),
        ),
      ),
    );
  }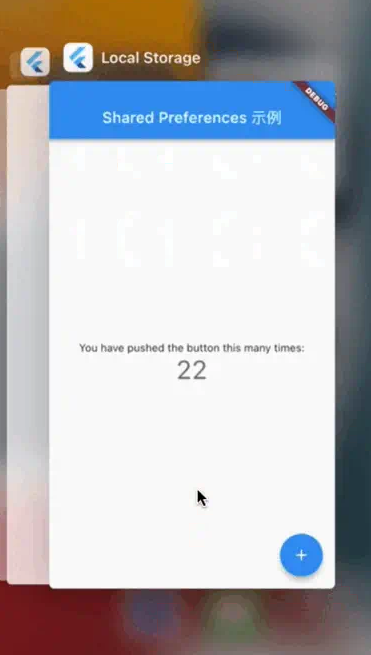
}上面的代码是一个基础的计数器应用,我们定义了一个_counter变量来保存计数器的值,并且使用 SharedPreferences 实例来存储和检索_counter变量的值。 在initState方法中,我们使用_loadCounter方法来加载_counter变量的值。在_loadCounter方法中,我们首先使用SharedPreferences.getInstance() 方法来获取 SharedPreferences 实例,然后使用 getInt()方法来检索 _counter 变量的值。如果检索到的值为 null,则将 _counter 变量的值设置为 0。 在 _incrementCounter 方法中,我们使用了setInt方法将 _counter 变量的值保存到 SharedPreferences 实例中来实现本地存储。 运行效果如下:
shared_preferences支持存储的数据类型有整型、浮点型(double)、字符串、布尔型和字符串数组。如果想存储对象,也可以通过 json 序列化和反序列化的方式实现。我们来看一个更复杂点的例子。
class MyApp extends StatefulWidget {
const MyApp({Key? key}) : super(key: key);
@override
_MyAppState createState() => _MyAppState();
}
class _MyAppState extends State<MyApp> {
// 初始化需要存储的值
int _counter = 0;
String _username = '';
bool _isDarkModeEnabled = false;
final _textController = TextEditingController(text: '');
// SharedPreferences 实例
late SharedPreferences _prefs;
// 加载 SharedPreferences 中存储的值
Future<void> _loadData() async {
_prefs = await SharedPreferences.getInstance();
setState(() {
_counter = _prefs.getInt('counter') ?? 0;
_username = _prefs.getString('username') ?? '';
_textController.text = _username;
_isDarkModeEnabled = _prefs.getBool('isDarkModeEnabled') ?? false;
});
}
void _incrementCounter() async {
setState(() {
_counter++;
});
await _prefs.setInt('counter', _counter);
}
// 保存用户名
void _saveUsername(String username) async {
setState(() {
_username = username;
});
await _prefs.setString('username', _username);
}
// 切换暗黑模式
void _toggleDarkMode(bool isDarkModeEnabled) async {
setState(() {
_isDarkModeEnabled = isDarkModeEnabled;
});
await _prefs.setBool('isDarkModeEnabled', _isDarkModeEnabled);
}
@override
void initState() {
super.initState();
_loadData();
}
@override
Widget build(BuildContext context) {
return MaterialApp(
title: 'Flutter SharedPreferences 示例',
theme: _isDarkModeEnabled ? ThemeData.dark() : ThemeData.light(),
home: Scaffold(
appBar: AppBar(
title: const Text('Flutter SharedPreferences 示例'),
),
body: Center(
child: Column(
mainAxisAlignment: MainAxisAlignment.center,
children: <Widget>[
Text(
'计数器的值:$_counter',
),
const SizedBox(height: 20),
TextFormField(
decoration: const InputDecoration(
labelText: '请输入您的名字',
),
controller: _textController,
onChanged: (value) {
_saveUsername(value);
},
),
const SizedBox(height: 20),
SwitchListTile(
title: const Text('启用暗黑模式'),
value: _isDarkModeEnabled,
onChanged: (value) {
_toggleDarkMode(value);
},
),
],
),
),
floatingActionButton: FloatingActionButton(
onPressed: _incrementCounter,
tooltip: '递增计数器的值',
child: const Icon(Icons.add),
),
),
);
}
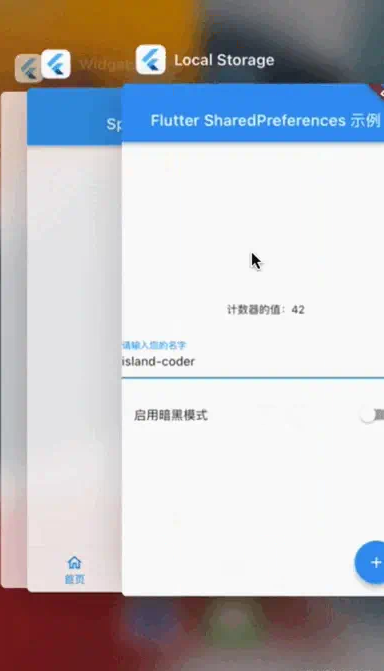
}上述代码增加了两个类型的存储,分别是字符串和布尔型,存储方式其实是类似的,布尔型使用 getBool 获取、setBool 存储;字符串则是使用 getString和 setString。我们通过布尔型变量控制是否启用暗黑模式,使用字符串类存储用户名。下面是运行的结果。
关于“Flutter本地存储之基本的键值对存储怎么实现”的内容就介绍到这里了,感谢大家的阅读。如果想了解更多行业相关的知识,可以关注亿速云行业资讯频道,小编每天都会为大家更新不同的知识点。
免责声明:本站发布的内容(图片、视频和文字)以原创、转载和分享为主,文章观点不代表本网站立场,如果涉及侵权请联系站长邮箱:is@yisu.com进行举报,并提供相关证据,一经查实,将立刻删除涉嫌侵权内容。