您好,登录后才能下订单哦!
密码登录
登录注册
点击 登录注册 即表示同意《亿速云用户服务条款》
小编给大家分享一下JS怎么实现的邮箱提示补全效果,相信大部分人都还不怎么了解,因此分享这篇文章给大家参考一下,希望大家阅读完这篇文章后大有收获,下面让我们一起去了解一下吧!
1、能够嵌入动态文本于HTML页面。2、对浏览器事件做出响应。3、读写HTML元素。4、在数据被提交到服务器之前验证数据。5、检测访客的浏览器信息。6、控制cookies,包括创建和修改等。7、基于Node.js技术进行服务器端编程。
具体如下:
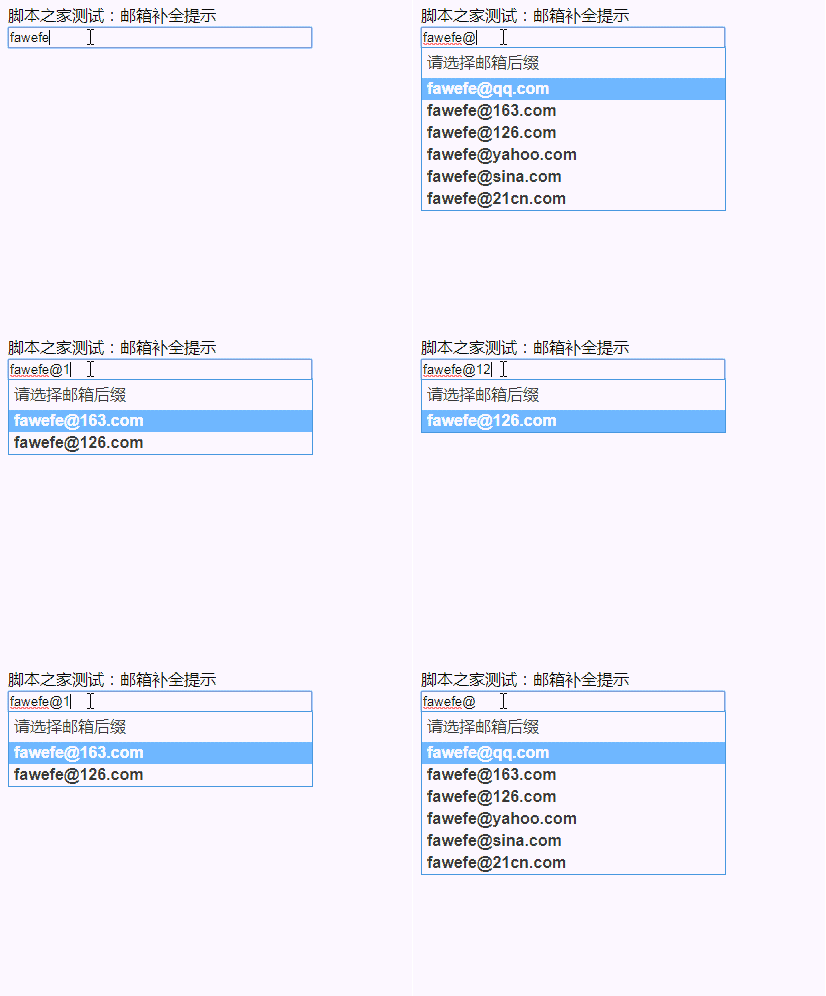
现在要实现的是类似网易登录时的邮箱提示框的效果,不过这里我打算稍微改变一下,就是在输入@的时候再出现邮箱提示列表
实现提示的原理是采用正则进行匹配
效果图如下:

代码如下:
<!doctype html>
<html>
<head>
  <meta charset="utf-8" />
  <title>邮箱补全提示</title>
  <style>
    ul{padding:0px;margin:0px;}
    .login_autoComplete{width:256px;border:1px solid #4190db;position:absolute;background-color:#ffffff;z-index:99;top:109px;left:40px;display:none}
    .login_auto_ul em{font-style:normal}
    .login_auto_ul li.login_auto_title{font-weight:normal;line-height:30px;}
    .login_auto_ul li{line-height:22px;text-indent:5px;font-family:"Arial";cursor:pointer;font-weight:bold;color:#333}
    .login_auto_ul li.hover,.login_auto_ul li.curr{color:#ffffff;background-color:#6eb6fe}
  </style>
  <script src="http://libs.baidu.com/jquery/2.0.0/jquery.min.js"></script>
  <script>
    window.email_auto = function(selector){
      var elt = $(selector);
      var strHtml = '<div class="login_autoComplete" id="login_autoComplete">'+
            '    <ul class="login_auto_ul">'+
            '      <li class="login_auto_title">请选择邮箱后缀</li>'+
            '      <li class="hover" hz="@qq.com"></li>'+
            '      <li hz="@163.com"></li>'+
            '      <li hz="@126.com"></li>'+
            '      <li hz="@yahoo.com"></li>'+
            '      <li hz="@sina.com"></li>'+
            '      <li hz="@21cn.com"></li>'+
            '    </ul>'+
            '  </div>';
      var lc = "#login_autoComplete";
      var autoComplete,autoLi;
      if($(lc).length==0){
        $("body").append(strHtml);
        $(lc).data("elt",elt);
        autoComplete = $("#login_autoComplete");
        autoLi = autoComplete.find("li:not(.login_auto_title)");
        autoLi.mouseover(function(){
          $(this).siblings().filter(".hover").removeClass("hover");
          $(this).addClass("hover");
        }).mouseout(function(){
          $(this).removeClass("hover");
        }).mousedown(function(){
          $(lc).data("elt").val($(this).text()).change();
          $(this).parent().parent().hide();
        });
      }else{
        $(lc).data("elt",elt);
        autoComplete = $("#login_autoComplete");
        autoLi = autoComplete.find("li:not(.login_auto_title)");
      }
      $(lc).css("width",elt.outerWidth()-1);
      //用户名补全+翻动
      elt.keyup(function(e){
        if(/13|38|40|116/.test(e.keyCode) || this.value==''){
          return false;
        }
        var username = this.value;
        if(username.indexOf("@")==-1){
          autoComplete.hide();
          return false;
        }
        autoLi.each(function(){
          this.innerHTML = username.replace(/\@+.*/,"")+$(this).attr("hz");
          if(this.innerHTML.indexOf(username)>=0){
            $(this).show();
          }else{
            $(this).hide();
          }
        }).filter(".hover").removeClass("hover");
        autoComplete.show().css({
          left : $(this).offset().left,
          top : $(this).offset().top + $(this).outerHeight(true) - 1
        });
        if(autoLi.filter(":visible").length==0){
          autoComplete.hide();
        }else{
          autoLi.filter(":visible").eq(0).addClass("hover");
        }
      }).change(function(){
        $("#login_autoComplete").hide();
      }).keydown(function(e){
        if(e.keyCode==38){ //上
          autoLi.filter(".hover").prev().not(".login_auto_title").addClass("hover").next().removeClass("hover");
        }else if(e.keyCode==40){ //下
          autoLi.filter(".hover").next().addClass("hover").prev().removeClass("hover");
        }else if(e.keyCode==13){ //Enter
          autoLi.filter(".hover").mousedown();
        }
      }).focus(function(){
        $("#login_autoComplete").data("elt",$(this));
      });
    }
    $(function(){
      email_auto("#xxx");
    });
  </script>
</head>
<body>
亿速云测试:邮箱补全提示<br/>
<input type="text" id="xxx" />
</body>
</html>
以上是“JS怎么实现的邮箱提示补全效果”这篇文章的所有内容,感谢各位的阅读!相信大家都有了一定的了解,希望分享的内容对大家有所帮助,如果还想学习更多知识,欢迎关注亿速云行业资讯频道!
免责声明:本站发布的内容(图片、视频和文字)以原创、转载和分享为主,文章观点不代表本网站立场,如果涉及侵权请联系站长邮箱:is@yisu.com进行举报,并提供相关证据,一经查实,将立刻删除涉嫌侵权内容。