您好,登录后才能下订单哦!
这篇文章给大家介绍Android中怎么实现自适应布局,内容非常详细,感兴趣的小伙伴们可以参考借鉴,希望对大家能有所帮助。
res/values/styles.xml
<style name="Container"> <item name="android:layout_margin">0dp</item> <item name="android:padding">16dp</item> <item name="android:layout_width">match_parent</item> <item name="android:layout_height">match_parent</item> <item name="android:orientation">vertical</item> <item name="android:background">@drawable/container_background</item> </style>
对于平板(竖直的)来说,我们可以添加一些外边距,因为屏幕够大。
res/values-sw600dp/styles.xml
<style name="Container"> <item name="android:layout_margin">0dp</item> <item name="android:padding">32dp</item> <item name="android:layout_width">match_parent</item> <item name="android:layout_height">match_parent</item> <item name="android:orientation">vertical</item> <item name="android:background">@drawable/container_background</item> </style>
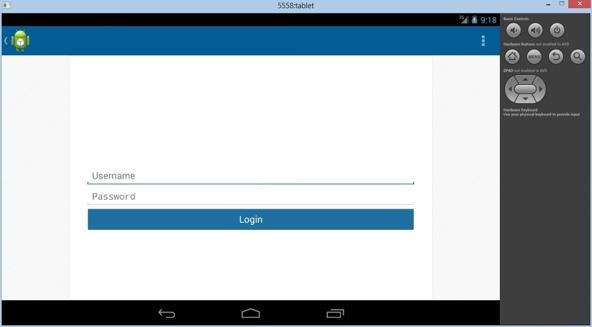
在平板上竖直和水平的***区别在于,我们会加上margin值,这样内容就不会充满整个屏幕了、我们还可以给父视图加一个背景图片,来填充空白区域。
res/values-sw600dp-land/styles.xml
<style name="Container"> <item name="android:layout_marginRight">130dp</item> <item name="android:layout_marginLeft">130dp</item> <item name="android:padding">32dp</item> <item name="android:layout_width">match_parent</item> <item name="android:layout_height">match_parent</item> <item name="android:orientation">vertical</item> <item name="android:background">@drawable/container_background</item> </style>
然后我们可以在不同的屏幕上,这样使用样式文件:
<LinearLayout style="@style/Container"> ... buttons, edit texts, text views, etc ... </LinearLayout>
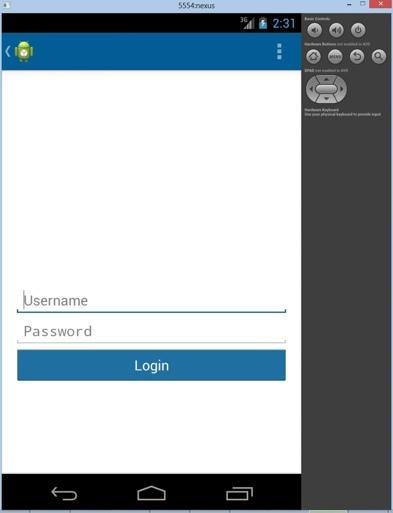
这是在四寸屏幕手机的效果:

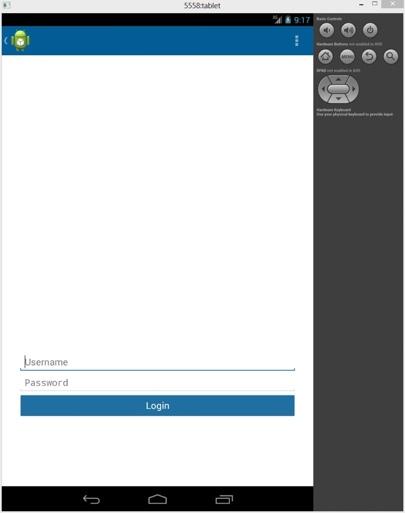
这是在七寸平板上的效果:

这是在七寸平板的横屏效果:

还有一些在CSS里面非常方便的属性(比如bootstrap),它们是一些帮助类,如.visible-phone,.hidden-phone,.visible-tablet等等,在Android上也可以这么做。
<!-- Device Visibility --> <style name="PhoneOnly"> <item name="android:visibility">gone</item> </style> <style name="TabletOnly"> <item name="android:visibility">visible</item> </style> <style name="TabletPortraitOnly"> <item name="android:visibility">gone</item> </style> <style name="TabletLandscapeOnly"> <item name="android:visibility">visible</item> </style>
把这些样式放在对应的配置文件夹中,然后就可以在需要的时候隐藏显示相应的控件了。
<LinearLayout android:id="@+id/column_one"> ... some content ... </LinearLayout> <LinearLayout android:id="@+id/column_two" style="@style/TabletLandscapeOnly"> ... some extra content since we have space ... </LinearLayout>
对于平板(水平的)来说,此样式会显示两列,但是对于大多数设备来说,第二列是不会显示的。
仅仅用了几行xml代码,我们就能够创建一个迷你的布局框架了,我们还可以扩展这种技术,根据需要去实现一个通用的样式文件,以后可以用到项目中。
关于Android中怎么实现自适应布局就分享到这里了,希望以上内容可以对大家有一定的帮助,可以学到更多知识。如果觉得文章不错,可以把它分享出去让更多的人看到。
免责声明:本站发布的内容(图片、视频和文字)以原创、转载和分享为主,文章观点不代表本网站立场,如果涉及侵权请联系站长邮箱:is@yisu.com进行举报,并提供相关证据,一经查实,将立刻删除涉嫌侵权内容。